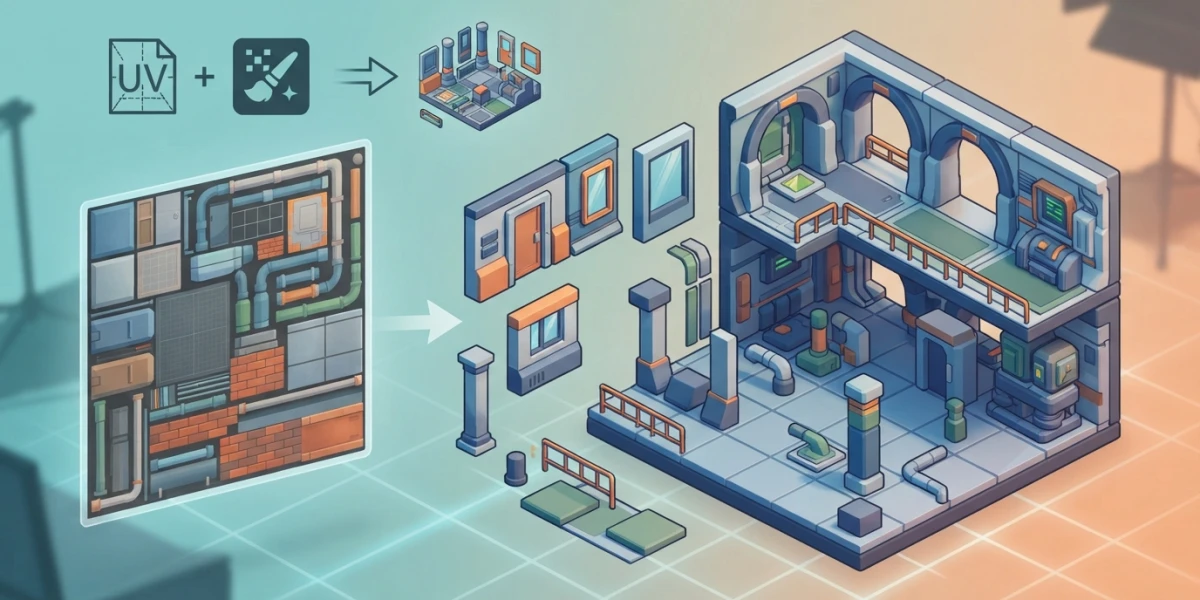
Image generated with AI
Trim Sheets and Modular Assets: A Game Art Guide

Diego Cortés
Author
Trim sheets and modular assets are why a corridor built from three textures looks richer than one thrown together with thirty. It is not a texturing trick: it is a production decision you make before modelling the first piece.
What a trim sheet is and why game art runs on them
A trim sheet is a texture strip designed as a catalogue: an edge, a moulding, a panel with bolts, a grated vent. Every piece in the environment crops and stretches its UVs onto that strip, so twenty modules share one image, and the detail is never modelled separately: it is placed wherever it is needed.
Trim sheet versus atlas versus tiling texture
An atlas packs different images so the hardware treats them as a single unit, each slice with its own texture coordinates, which cuts read cost and improves memory locality; a tiling texture stamps the same pattern across a surface. A trim sheet takes the best of both: a fixed strip you consume by cropping each module's UVs on top of it. The gain is not aesthetic. Maya's UV mapping notes remind you that graphics memory is degraded above all by how many maps an asset uses, which is why the docs recommend atlases when building environment art. If you have never unwrapped UVs, start with the base Blender unwrap.
When not to use one: hero assets, organic shapes and cloth
It does not fit everything. Hero assets, organic shapes, skin and cloth want their own textures, and an environment made of one-off objects has no pieces to share a strip. With a retro pixel art look, all tiny textures and a limited palette, the strip is overkill.
Texel density: the rule that keeps everything consistent
If two pieces in the same set get a different number of pixels per metre, the eye catches it at once: one looks sharp and the other blurry. Texel density turns that feeling into a number.
How to calculate texel density
Texel density equals texture pixels divided by the metres they cover. A 1024 px strip mapped across a 2 m panel gives you 512 px/m; stretch that same panel to 4 m and you drop to 256 px/m, half the detail. At 512 px/m each texel is roughly 1.95 mm (1 divided by 512), and a 2048 px texture covers 4 m across. The practical rule: if two pieces share a strip, the strip and the UV scale must land on the same density; when one piece needs more detail, give it a taller band rather than a little more scale.
Margins are calculated too: at least 2 px to the map edge and 4 px between islands, doubled at every LOD step. With 3 LOD steps on a 2048 px texture you need 16 px between islands and 8 px to the edge.
Lock it first, exaggerate later
Maya recommends locking a uniform density across all islands and then scaling by visibility, raising it on what the player looks at closely and lowering it on what is only seen from afar. To practise it there are Spanish-language videos, such as Texel Density Checker en español.
Trim sheets: planning the strip before you model
The strip is designed before any geometry exists; deciding it early saves you from re-laying UVs later, the most expensive rework in this workflow.
Resolution, bands and working top to bottom
A 2048 px strip split into 4 horizontal bands gives 512 px per band; with 8 bands, 256 px each, and that number caps the detail you can get. Order the strip by type of detail (a trim, a moulding, a panelled section, a grate) and keep a clean band for decals, saving the fine detail for where the player will look closely.
Building the modular kit: the grid rules
A modular kit is a set of pieces that fit together: walls, columns, corners. If every piece respects the same grid, any combination works.
Scene units and increment snapping
Set your units before you model: Blender's scene unit system (Metric, Imperial or None) is what makes "one module equals 2 m" mean anything. With snapping set to Increment you move in multiples of the grid (hold Ctrl for temporary snapping), and the Mirror modifier handles the pieces that repeat on both sides. When the module starts from hard surfaces, the closest neighbour is hard surface modelling.
Pivots, fit and the modular kit library
Pivots sit on the grid so pieces assemble with no manual nudging. Once the kit holds up, save it as a library: the Asset Browser lets you drag each module into a scene and Outliner collections separate modules, UVs and tests. Before that, the mesh has to be clean, and retopology is the step that makes it so.
Folding geometry onto the strips: UVs in Blender
With the kit modelled, each piece folds onto its band. Align (Shift-W) moves the selected UV vertices to a line defined by the chosen axis, with options such as Straighten, Straighten X and Y and Align Auto, which picks the axis with the best alignment; Align Rotation straightens whole islands to the U or V axis using three methods: Auto, Edge and Geometry.
Arrange/Align Islands and Pack Islands
Arrange/Align Islands lays the selected islands in a straight line on the UV grid, with initial position, axis, alignment, order and margin, and the manual describes it precisely for aligning modular texture pieces, which makes it the star tool here. Pack Islands reshuffles everything to use the space and guarantees a margin between islands. With Custom Region (Ctrl-B to define it and Ctrl-Alt-B to activate it) you pack islands inside a single band, which is exactly what you want: match the scale first with Average Island Scale and cut angle distortion with Minimize Stretch. To finish, Pin and Unpin locks UVs that already work, and Stitch (Alt-V) sews UVs that share vertices.
The same UVs in Maya: the UV Toolkit
The order is the same, and the starting point, if you are new, is the Maya unwrap and layout. Straighten UVs has several routes: Align & Snap aligns UVs to the furthest one in the chosen direction; Unfold offers Straighten UVs with Maximum Angle and Axes; Match Grid fits them to the grid; and Straighten Shell straightens an edge loop and unfolds around it.
Pin and snapping
Pin UVs stops UVs from moving during operations such as grab, smear or unfold, and pinned UVs turn blue; snapping uses x for grid intersections and v for other UVs.
Texturing the strip: Substance 3D Painter
One texture set per material ID
Painter creates a texture set for every material ID it finds, and expects unique UVs per material ID, or a logical overlap on mirrored geometry. The material side of the workflow is covered in PBR texturing with Substance and in the anchor points tricks.
UV Tiles and UDIM
UV Tiles let you texture more than one set of textures across several UV ranges inside one texture set: each range becomes a dedicated texture and the effective resolution goes up. It only supports the UDIM naming convention. The step before texturing is baking maps from the high-poly to the low-poly mesh, explained in baking maps in Blender.
In the engine: fewer materials, more pieces
Material instances
In Unreal Engine, material instances change a material's look without paying the shader recompile: each instance inherits from the master material and you can only edit what was declared as a parameter in the parent. Watch out for static parameters: every combination generates a new shader. Taking the kit into the engine builds on Unreal Engine 5 for 3D artists.
RGB masks and decals
On the same strip you get variation from RGB masks and decals, without touching the base texture. For large textures, virtual texturing cuts memory: Runtime Virtual Texturing generates texels on the GPU during play and Streaming Virtual Texturing loads cooked texels from disk. Keeping pieces coherent is part of the criterion explained in why 3D renders look fake.
The full workflow: from cube to scene
The steps in order
Set units and grid; decide the strip layout; model the modules on the grid and save the kit; unwrap and order the UVs with Average Island Scale and Pack Islands per region; check texel density; texture the strip in Painter; and export to the engine with instanced materials and decals.
The curated videos to start with
Make your Own Decals/Trim Sheets walks the whole strip from scratch; Creating Trim Sheet UVs for Substance 3D Painter focuses on the strip's UVs; Texel Density explains density in Spanish; and Asset Variation With RGB Masks shows variation in the engine. There are more pieces under the modular tag and in the Substance Painter category.