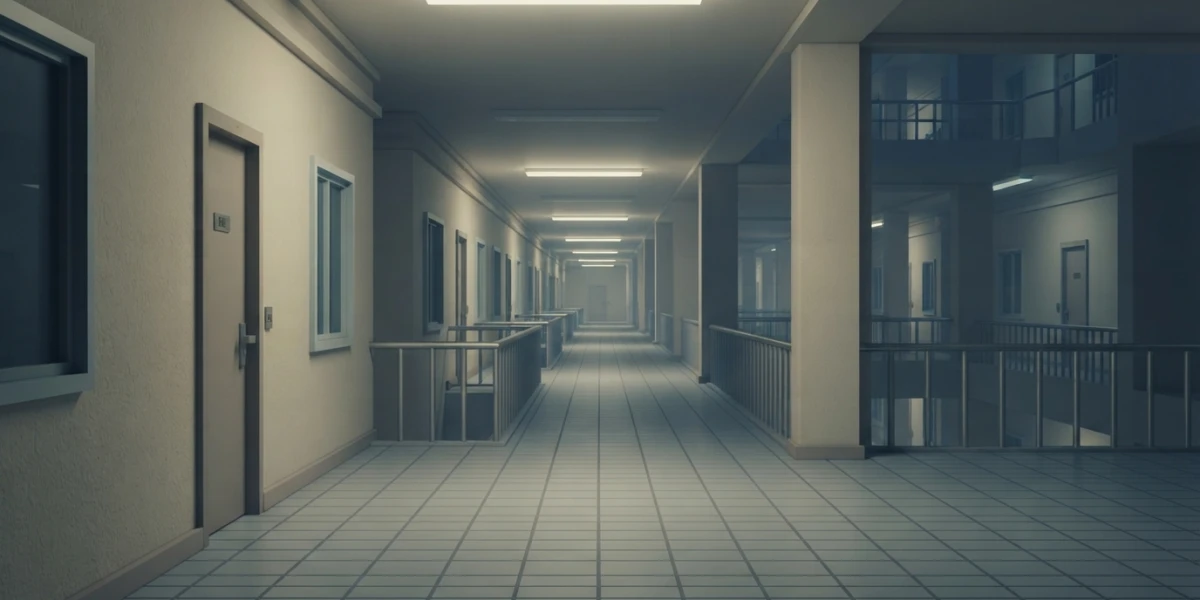
Image generated with AI
Liminal Spaces in Blender: How to Build One

Diego Cortés
Author
A yellow-carpet hallway, fluorescent tubes buzzing and not a single person in sight. Building liminal spaces in Blender means assembling, piece by piece, a place nobody is supposed to be looking at. You don't need a complex model: you need art direction.
What Makes a Place Feel Liminal
The word comes from the Latin limen, threshold. In the rites of passage described by van Gennep in 1909, the liminal phase is the middle one: you are no longer what you were and not yet what comes next. Victor Turner summed it up with a phrase that fits an image perfectly: betwixt and between.
Applied to a building, a liminal space is a place designed to be walked through, not stayed in: a corridor, a staircase, a waiting room. The familiar, out of context. The absence of people is what turns a place we know by heart into something strange.
The mechanism has a name. A 2022 study by Diel and Lewis found that deviations from the structural patterns we expect in a building trigger a response similar to the uncanny valley. Peter Heft called it a failure of presence: what should be there is missing. That gap, not the jump scare, is what unsettles people.
The cultural wave did the rest. In May 2019 an anonymous thread asked for unsettling images that felt out of place: out of it came the Backrooms. The pandemic emptied real public spaces and the aesthetic exploded; by 2022 the dedicated subreddit had passed 500,000 members and the hashtag had crossed 2 billion views on TikTok. In 2026, Kane Parsons' series, made in Blender and After Effects, reached cinemas as an A24 feature.
How to Build Liminal Spaces in Blender
Blender does not ship an unease button. It ships everything you need to repeat, light and lovingly wreck a scene. These are the blocks that show up again and again in the genre.
Geometry: The Hallway That Never Ends
Composition rules first: a single vanishing point, near-perfect symmetry, a low ceiling and a corridor that fades into the distance. Modules repeat without variation (doors, ceiling panels, fixtures at regular intervals), and one rule is broken on purpose: no windows and no visible exit. The original Backrooms photograph shows not a single one.
The fastest way to build it in Blender is a modular kit: model one corridor segment and repeat it with an array or by duplicating with grid snapping. Keep props in a separate collection and use the Outliner so you do not get lost (see low poly modeling and collections and the Outliner).
Materials: Carpet, Wallpaper and Wear
This is where credibility is won or lost. The right palette is the one you remember from the eighties and nineties: carpet, yellowed wallpaper, ceramic tile, ceiling panels with visible seams. And nothing should look new: uneven roughness, soft stains, misaligned joints and dirt collecting in the corners.
The procedural route handles almost all of it without modeling every stain: noise for roughness, some color variation and wear concentrated on edges. The basics are in procedural materials (wood, metal, glass) and the full mechanism is in shaders with nodes.
Light: Fluorescent Tubes That Never Settle
The tube is the most important object in the scene, because it is the only one that works. Model it as simple geometry with an emission material so it glows, but in EEVEE the emissive object does not light the scene on its own: the light that actually illuminates is a rectangular area light with the proportions of the tube.
The Blender 5.2 manual includes a handy equivalence table so you are not guessing: a 2,500 lumen fluorescent tube equals 4.5 watts of radiant power as a rectangular area light. Even so, real-world values look wrong, because the eye adapts and the engine does not: you compensate with Exposure, under Render - Film, and with the light's temperature. The art rule is counterintuitive: flat, white-greenish light with no dramatic shadows; the unease comes from normality. Neon night scenes are its exact opposite, as seen in night lighting, and floating dust belongs to volumetrics, though here the air usually stays clean. To compare engines, look at EEVEE vs Cycles: iterate in EEVEE, deliver in Cycles.
The Detail That Sells the Shot: The Flicker
A real fluorescent tube does not flicker on a beat: it stumbles. Animate the light's power with two or three keys and then apply a Noise F-Curve modifier in the Graph Editor: it alters the curve with a noise formula, exactly what an irregular tremble needs.
In Replace mode it adds variation across a range of minus 0.5 to 0.5, controlled by Scale (frequency), Strength (amplitude), Offset and Phase (offset and seed), and Depth, Lacunarity and Roughness (detail). Three tricks worth a lot: keep the flicker to a few frames, give each tube its own seed so the scene does not stutter in unison, and make the tube's emission flicker along with the light. If the shot gets animated, samples and denoise are covered in Cycles optimization.
Camera: Looking the Way the Human Eye Doesn't
The liminal camera plays by its own rules. Wide angle, in the 24 to 35 mm range, because a shorter focal length takes in more of the scene (the manual uses 35 mm as its example of a normal perspective and explains exactly that). Eye height, or slightly lower. A centered frame and, very often, a tilted one: the original Backrooms photograph sits on a Dutch angle.
The Lens panel has a control almost nobody uses and it is gold here: Shift moves the vanishing point without tilting the camera, perfect for keeping the corridor too perfectly centered. If the shot moves, let it be an imperceptible push; the groundwork is in cinematic camera animation. And if instinct pushes you toward the classic three-point setup, resist: that lighting explains the scene and here we want the opposite, as shown in three-point lighting.
The Finish: Making It Look Like a Faded Old Photo
Most of the feeling lives here, and it is pure compositing: images in the genre look slightly blurry, slightly desaturated and grainy, like something pulled out of a memory. Blender 5.2 has a family of camera and lens effect nodes for exactly this, and the manual is explicit: they simulate real optical imperfections.
The four that matter:
- Film Grain: real film stock presets (8 mm, Super 8, 16 mm, 35 mm Portra, 70 mm) plus an Animated switch so it changes every frame. With Preset and Style set to Custom you unlock ISO, Softness (the halation around lights), Acutance and Coarseness.
- Vignette: Factor, Feather, Corner Roundness, Scale, Offset and Angle, with a Mask output so you can darken only where it matters.
- Chromatic Aberration: Offset, Scale, Directional Blur and Lens Dispersion, which produces the realistic rainbow fringe near the edge of frame. If you can see it, it is already too much.
- Sensor Noise: separate luminance and chroma noise, also with Animated: the look of a digital photo shot in low light.
Two reminders about order. First, work in linear and color correct before the grain; the correct order is in color management, with AgX or ACES. Second, to separate lighting from materials you have passes and AOVs, and the logic of assembling a full shot is in how a shot is composited.
Conclusion: The Coherence of Emptiness
What makes a scene work is not a particular asset: it is the coherence of emptiness. Geometry that repeats identically into the distance, light that never settles and a finish that looks like a photograph from another decade. When those blocks all point the same way, the scene feels wrong in a way that is hard to name, which is exactly the goal.
It is worth seeing how others solved it before you open the file. The platform has three videos from this neighborhood that work as direct references: How I Make Realistic Liminal Spaces in Blender by The Workshop Warrior; How to Create a Liminal Bunker Environment by CG Masterclass; and How To Make The Backrooms In Blender by Blender Guru.
And if this sparked your curiosity about the whole craft, the platform holds a curated collection of Blender, animation, VFX and 2D art tutorials. Start where your foundations are thinnest: there is a path written for people starting from scratch in learning CGI from zero.