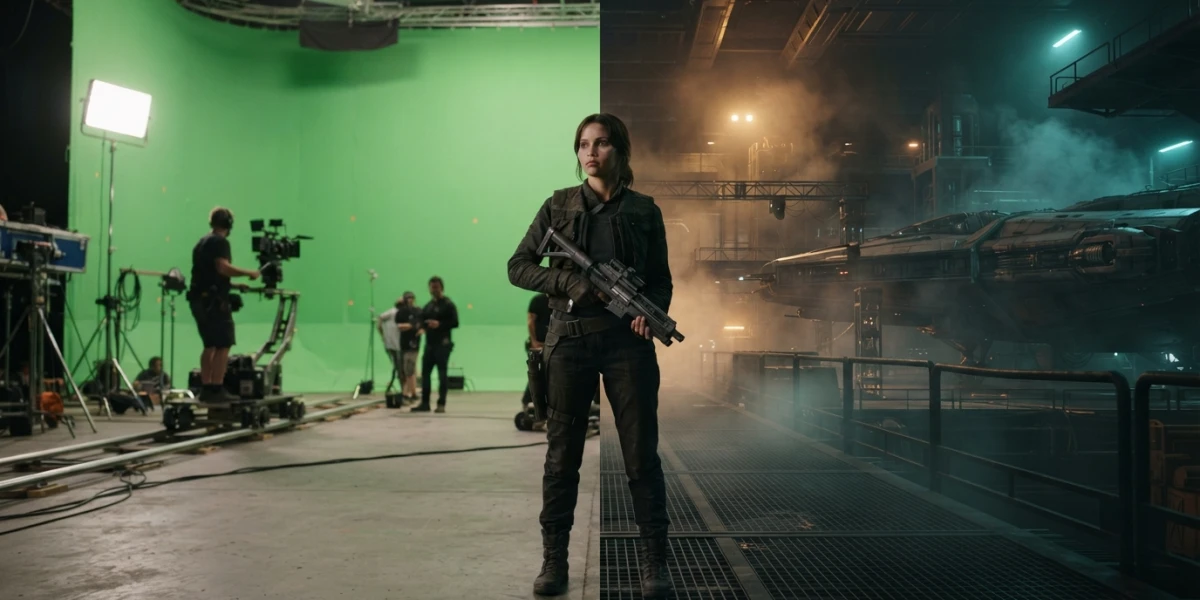
Image generated with AI
VFX Compositing: How a Shot Comes Together Step by Step

Diego Cortés
Author
A VFX shot does not end when the render finishes: it ends when the render, the plate, the mattes and the effects become a single believable image. That work is compositing, and it has an order.
What Compositing Is (and What It Is Not)
Digital compositing is the assembly of several images into one. It is the digital version of the optical compositing done on film, and the last stage of visual effects work: where footage and renders shot separately become a shot.
The core operation is alpha blending: an opacity value decides how much of the element and how much of the background sits in each pixel. Every element also needs its matte, a black and white image that says where it is; that matte travels in the alpha channel.
One detail explains half the craft: blending in a non-linear space leaves aliased edges and halos. That is why compositing is done in linear space, and why the colour space of the plate is the first thing you check.
What It Is Not
It is not editing: ordering shots is editing, and for that your starting point is the Blender video sequence editor. It is not motion graphics either. Compositing is making separate pieces work as a single photograph.
The Compositor Is the Last Quality Gate
The compositor sees the shot assembled first and decides whether the render is good enough as delivered. The 3D artist is not asked for a render, but for working materials.
The Real Order of a Shot, Step by Step
1. Brief, Breakdown and Order
What the shot asks for, which elements make it up and who delivers what. It sounds like admin work and it saves the most time. And before anything else, confirm the colour space of the plate: mislabelled, it contaminates everything.
2. Isolating the Subject: Roto or Keying
The first real decision. With a green screen you key; without a screen you roto, drawing the matte over the plate by hand. On hair or fast motion, the roto eats the hours.
3. Tracking and Stabilising
The tracker keeps an added element stuck to the world instead of floating, and stabilisation lets you work on a still image and put the motion back later. Without it the shot does not hold up: review matchmoving in Blender.
4. Integrating: Colour, Light and Edges
This is where a shot becomes believable or not. The colour of the element has to match the light of the plate, the spill has to go, and edges cannot be a clean line: no perfect edge exists.
5. Finishing: Grain, Defocus and Elements
Grain from the original material, a defocus that matches the camera, and the additions everyone notices without buying them: dust, atmosphere, flares, smoke. Simulation work such as smoke with geometry nodes arrives raw and settles here.
6. Delivery: Format, Range and Colour Space
The Blender manual's rule: if the comp keeps alpha, PNG; if it keeps depth, EXR; if it is a sequence for review, a video format. Getting this wrong loses the work of the previous stage.
Keying: a Green Screen Is Not Enough
What Has to Be Solved Before the Shoot
The challenge of chroma keying is not the key, it is the light: the narrowest possible colour range and no shadows on the background, because a shadow registers as a different colour and stops being replaced on its own. Green and blue are used because they sit furthest from skin tones.
Keying Inside Blender's Compositor
The manual warns about both extremes: pulling too much green leaves actors looking flat or purple, so it pays to chain nodes and refine step by step. The Keying node does chroma keying and despill at once; its preprocessing blurs colour only and affects the matte calculation alone. A garbage matte is not a node but a technique, a mask that excludes what no automatic key can solve. The walkthrough is in the green screen keying tutorial.
Colour Spill
The Color Spill node offers a factor, a channel and a strength. It gives skin its natural colour back and is the one you notice most when missing: a face with green in the ears gives a comp away faster than any other mistake.
When There Is No Screen: Rotoscoping
Rotoscoping means drawing the matte by hand over the shot. It started as an animation technique, with Max Fleischer's rotoscope, and in VFX it means the same thing: creating the matte of an element by hand so it can be composited over another background.
What the Compositor Needs from the 3D Artist
Passes (AOVs) Instead of a Single Image
A pass is intermediate render information extracted as a separate image: diffuse colour, light, depth, normals. They reach the comp through the Render Layers node and let you correct without re-rendering. The depth pass feeds camera defocus, but it is noisy if the render already uses depth of field: the Mist pass is cleaner there.
Per-Object Mattes: Cryptomatte
The ID Mask node extracts an object or material by index, but it depends on the IndexOB pass and only works in Cycles. The manual considers it superseded by Cryptomatte, which runs in Cycles and EEVEE and lets you adjust the selection from the node interface.
The Shadow Catcher
It renders only the shadow or the light interaction of an object, with no visible geometry, so it can be integrated over the plate. That is how a CG object truly sits on a scene: instead of fighting the ground, you deliver the shadow; in Blender it is an object option.
Linear, Not Display-Referred
Data is handled in the linear space and converted only when displayed or delivered. In Blender that runs through colour management (see the post on colour management in Blender) and through the Convert Colour Space node when an element is treated as data.
Where You Composite Today: Three Different Routes
After Effects
Adobe's application for digital effects, motion graphics and compositing, used in film, television and games: keying, tracking, compositing and animation. Its model is layer based and its real advantage is the ecosystem; if you come from design, it is the gentlest way in.
Nuke
Node-based digital compositing software, first developed at Digital Domain in the early nineties (the name comes from new compositor) and developed by Foundry since 2007. Studios such as ILM, Weta, Imageworks and Framestore use it: it is the language of a feature pipeline.
Blender's Compositor
It is built into the tool where you model and render: it processes one image at a time, works with nodes, and can stay active as part of the render through the compositing pipeline option. Version 5.2 brought 35 new nodes and trees can be saved as assets. The advantage for someone learning is concrete: zero cost and the files you already render.
How to Choose Without Dogma
Look at where the team is and what the delivery asks for. To learn, any of the three works and the concepts are the same; the difference appears when the shot has many elements.
The Five Mistakes That Give a Comp Away
1. Colour Space and Alpha Mishandled
Blending in a non-linear space leaves halos and aliased edges. In the Alpha Over node, the Straight Alpha checkbox is only for images in straight alpha: it stays off.
2. Edges and Spill Left Untouched
A perfect matte still gives the comp away if the edge keeps the green or the CG element arrives with a hard rim. Fix it with colour spill and a slight edge blur.
3. Grain That Does Not Match
Grain is part of the texture of the original material. If the plate has grain and the element arrives clean, the eye spots it before knowing why.
4. Inconsistent Depth of Field and Motion Blur
On chroma it is recommended to shoot with more depth of field than usual, because the background's can be reproduced later. If the element is sharp while the plate is soft, no colour grade will save it.
5. Saving Without the Passes
The expensive mistake: render the final image and discover at comp time that a pass is missing. Passes are enabled before rendering, and anyone who will composite needs light, depth and normals.
Your First Practice Shot: the Short Route
Three stages, one hour each: a green screen shot for keying and colour integration; a shot where an object has to be rotoed because it was not shot against chroma; and a CG element over real footage with tracking, shadow catcher and grain. If you are missing the big picture of the craft, the post on learning CGI from scratch lays out the whole pipeline.
Conclusion
Compositing is the craft of making separately shot pieces believable together. Understanding the order (isolate, integrate, finish) matters more than mastering one piece of software: the tools change and the sequence of the work does not. The hand-picked compositing tutorials on the platform cover keying, integration and finishing, free of charge.