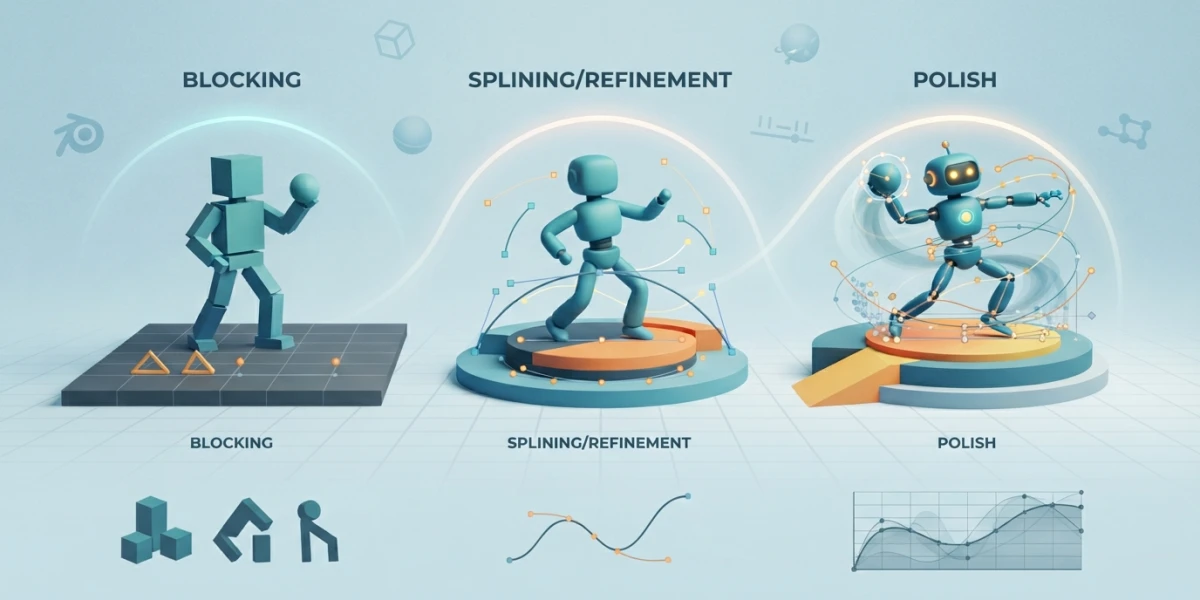
Image generated with AI
Blocking, Spline and Polish: How a 3D Shot Gets Animated

Diego Cortés
Author
Blocking is the stage where a shot's timing gets decided: key poses with no interpolation, so the motion reads before it exists. If your animation feels weak, it is rarely the curves - it is that timing was settled too late.
The principles are covered in another article on the blog and curves have their own guide in the Graph Editor. This one is about the order of production.
How a 3D Shot Gets Animated: The Map Before the Detail
A shot is not animated in one pass: it is built in layers. First where the character is and when; then how it travels from one pose to the next; only at the end the detail. Every stage has its exit criterion, and skipping one costs you rework.
Why a shot is built in stages
If you start by smoothing curves, any timing change forces you to redo everything: poses, arcs and overlap. With timing locked in stepped poses, moving a key takes minutes. Pose to pose is the standard when composition matters; straight ahead gives fluidity but makes proportions hard to keep, and in production the two get combined.
The minimum vocabulary
Key pose: an important moment of the motion. Extreme: the furthest or most expressive pose. Breakdown: the pose that explains how you get from one to the other. Hold: a pose kept alive with micro-movement inside it.
Stage 0 - Before Touching the Keyboard: Reference, Storyboard and Previz
Reference is filmed, not imagined: acting in front of a camera answers questions about weight, rhythm and gaze that no curve tweak fixes later. Shoot the action, watch it slowed down and note the frames where the accents land - that turns a hunch into data.
From storyboard to animatic to previz
A storyboard previews the scene as a sequence of panels; with timing and sound it becomes an animatic, and previz tests staging, camera and editing without real production costs.
Stage 1 - Blocking: Poses and Timing Only
Blocking answers two questions: where everything is and when it happens. You place the shot's key poses, props and camera included, and adjust the spacing between them until the story reads with no detail.
Why blocking looks like a robot
Because interpolation is on Constant (stepped): the curve holds a key's value until the next one. That jump is intentional: without automatic interpolation the eye judges only silhouette, timing and rhythm.
In Blender: Constant interpolation and Extreme/Breakdown keys
The manual describes Constant as the mode used only during the initial blocking stage of pose-to-pose workflows. Linear avoids abrupt value changes but not velocity changes; Bezier, the default, smooths both. Key types keep stages separate: a cyan diamond for a Breakdown, dark grey or orange for a Moving Hold and a large pink one for an Extreme.
The Dope Sheet is the modern exposure sheet
The Dope Sheet gives a bird's-eye view of the key frames and descends from the classic exposure sheet, with one column for the animator's notes, one for dialogue broken into phonemes and one per animation level. A grey bar between identical keys is a held key; a green line warns of non-Bezier interpolation.
Stage 2 - Breakdowns: The Poses That Explain the Action
With timing approved you add breakdowns: poses with intent that define the movement in more detail. They are not an average between two poses, they are the knee that leads or the elbow that guides the punch.
In-betweens, extremes and moving holds
Extremes mark the reach, in-betweens the path, and moving holds keep a waiting pose from freezing. With too few in-betweens the illusion of movement collapses.
The trap of a single key "in the middle"
Dropping one key in the middle and trusting interpolation produces symmetrical, weightless motion. Decide the arc first, then distribute keys according to where the action accelerates and where it slows.
Stage 3 - Spline: Turning Stepped Poses into Curves
Splining a shot is not cosmetic: it is the moment the software starts proposing motion. Foot sliding appears, overshoot where it does not belong, and odd acceleration where there used to be intent.
What changes when you switch to Bezier (and the classic mistake)
The classic mistake is converting everything to Bezier and never looking at the curves again. In a well-blocked shot every key has a reason, and smoothing adds movement where there was none. Your first spline pass should walk the controllers that move most and turn smoothing off wherever it breaks the intent.
Handles: Automatic, Auto Clamped and the overshoot problem
The manual recommends Auto Clamped by default because it avoids overshoot and unwanted direction changes, and reserves Automatic for the points where that overshoot is wanted. Handle smoothing has two modes: None, which only looks at adjacent keys, and Continuous Acceleration, which uses the whole curve and suits sparse keyframing.
Stage 4 - Polish: Weight, Arcs, Retiming and Secondary Action
Polish does not mean doing more: it means getting weight, clean arcs and life in the holds. Everything gets touched here, but on top of an approved base.
Retiming: move the timing without redoing the animation
Retiming means shifting keys or whole stretches to push an accent earlier or later, and it is the reason to keep a shot organised. If the set will stay alive, there is a separate guide on layers and non-destructive assembly.
Arcs, overlap and the holds that add life
Checking arcs means confirming that every limb travels along a curve and not in a straight line; the rigging decision behind that is in the IK versus FK article. Overlap makes soft parts arrive slightly later, and holds need a small background life.
Polishing on loop: preview range and Ghost Curves
Set Preview Range limits playback to the stretch you are polishing. Ghost Curves creates a snapshot of the current curves as a background reference, ideal for comparing the polish against the blocking.
Stage 5 - Review: Playblast, Markers and Dailies
A shot is not finished until you have watched it the way it will be seen: in real time, on loop, with someone else's opinion on top.
Playblast: the "sketch" you review (Blender and Maya)
Playblast captures the viewport on every frame and sends them to a viewer: a realistic idea of the final render without its time cost. In Maya 2027 it saves to the project's Movie location and the viewer must be closed to playblast again. The blog already covers keys, layers and playblast in Maya.
Markers and Bind Camera to Markers
Markers denote frames with significant events: add them with M and rename them with F2. Bind Camera to Markers lets you switch the active camera at marked frames, and they are the cheapest way to assemble a long shot.
Dailies (sweat box): critique as part of the method
Dailies, or rushes, are the day's unedited footage reviewed together. The value is still catching early whatever does not read, with notes about the work and in the same technical language as blocking and spline.
The 6 Mistakes That Give a Beginner Away
- Jumping to spline before the timing reads in stepped poses.
- Leaving a single key between two extremes and trusting interpolation.
- Converting every curve to Bezier and never looking at them again.
- Animating without auditing arcs: limbs travelling in straight lines.
- Frozen holds with no background life.
- Polishing detail before staging and timing are approved.
Checklist: How to Know Each Stage Is Done
- Blocking: the shot reads in stepped poses and with no sound.
- Breakdowns: every transition has a path and an intent.
- Spline: curves respect the blocking's intent, with no overshoot or sliding.
- Polish: weight, arcs, overlap and life in the holds, all resolved.
- Review: real-time playblast, markers placed and one round of dailies.
What to Watch on the Platform, Stage by Stage (Curated Videos)
The process is far easier to understand when you watch someone execute it. The platform has curated tutorials that follow these stages: for the overall map, the seven workflows of professional animators and the five steps to great 3D animation in Blender; for the vocabulary, keys, extremes and breakdowns; for the switch to curves, why your stepped animation sucks in spline and using Blender's Graph Editor like a professional; for polish, retiming; and for practice, free rigs.
Conclusion
Blocking is not a poorer version of animation, it is animation with the noise removed: if the shot works in stepped poses, it will work smooth. The rest of the process is about respecting that timing while adding weight, arcs and life, and reviewing it in real time. It is a ladder, not a religion: knowing which stage you are skipping is what separates an exercise from a deliverable shot.