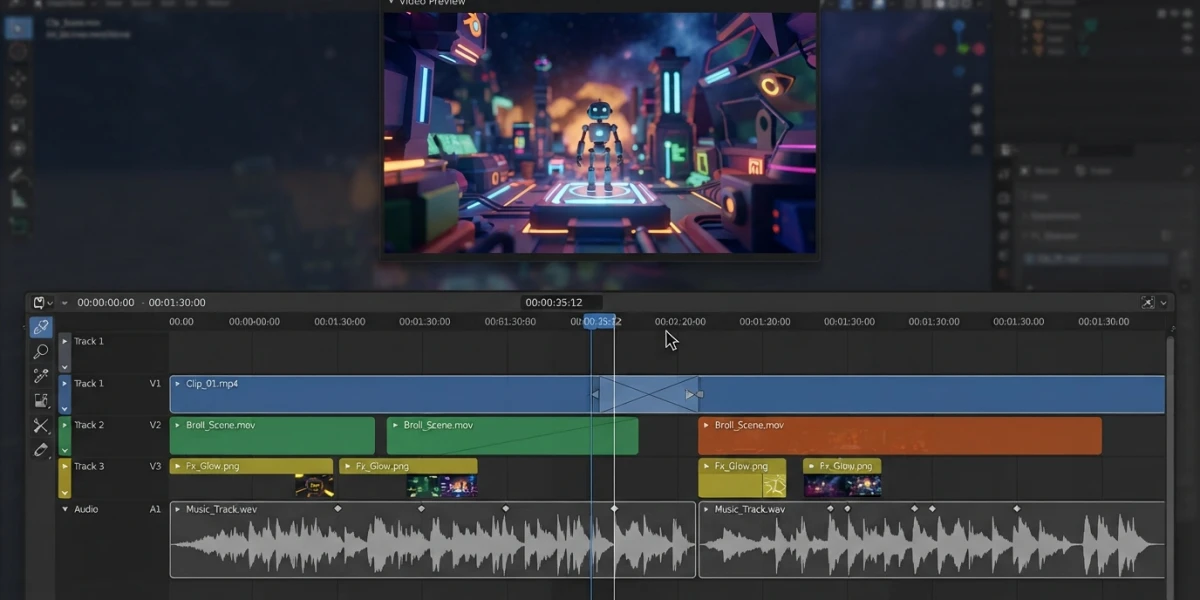
Image generated with AI
Video editing in Blender: assemble your 3D renders

Diego Cortés
Author
Your render is done, but the video does not exist yet: you still have to assemble the takes, lay down the sound and export. Video editing in Blender with the Video Sequence Editor covers that step without leaving the app or opening another editor.
What the Video Sequence Editor is and why it lives inside Blender
The Video Sequence Editor, best known as the VSE, is Blender's built-in non-linear video editor: a timeline where video clips, images, audio, 3D scenes, text and effects come together to produce a final video. It was born to assemble animations rendered by Blender itself, so its natural workflow starts exactly where the render ends.
Video Sequence Editor, Video Sequencer or VSE?
The name changed quietly between releases: the 2.x manual called it the Video Sequence Editor and the current one, for the 5.x series, calls it the Video Sequencer. There was no official rename and no API change: all three lead to the same editor.
Compositor or Sequencer: two ways to make the video
The Compositor works frame by frame with nodes: it is the place for per-image finishing, AOV passes or per-frame effects. The Sequencer works with time: strips on a timeline. To assemble a movie with cuts and sound you use the Sequencer; to polish each frame you use the Compositor.
Getting started: the Video Editing workspace and your project
The Video Editing template
Blender ships a Video Editing template that opens the editor with the preview and the timeline ready to work. Since 5.0 the template was redesigned and its default scene is called Edit.
Resolution, frame rate and frame range
Before editing, set the resolution and FPS of the project in Output Properties, along with the frame range: the final video inherits that size and cadence.
Built-in Playback Controls
Since 5.0 the Sequencer has its own playback controls region, with Jump by Delta to skip by seconds or frames. You no longer need to open the Timeline editor just to play back or set the working range.
Bring your renders to the timeline
Video, image sequences and EXR
Shift+A opens the menu for adding strips. Movie adds a video file; Image or Image Sequence add individual frames, including EXR sequences from open-exr renders. In 5.0 you can also add images in batch from the file browser or by dragging them straight into the timeline.
Audio and syncing
Sound strips show their waveform, which makes syncing easy with scrubbing: Blender plays the sound while you move the playhead. If you retime a sound clip, since 5.0 pitch is preserved by default (pitch correction), so nothing rises in pitch when sped up.
Scene strips: use your 3D scenes directly
The VSE can use 3D scenes as strips without rendering them first: change the scene and the strip updates on its own. Since 5.0 each workspace has its own Sequencer Scene and the Sync Scene Time option switches the active scene as you scrub. This is the workflow Blender Studio uses for storyboards, combining a scene with Grease Pencil and rendering nothing in advance.
Titles and subtitles
Text strips add text over the video. In 5.2 they bring style presets (Subtitles, Main Title, Corner Title) and adjustable line spacing.
Cut, trim and arrange: basic editing
The Blade tool and cuts
Blade cuts strips at the playhead or wherever you drag. Since 5.1 it supports a box gesture for fast ripple cuts: the strips that follow slide automatically to close the gap; Shift keeps the gaps.
Handles, slip and snapping
Every strip has handles to trim its in and out points without touching the content, key for not losing footage at the ends. Since 5.0 handles are clamped to the real content by default and the C key restores the legacy behavior. There is a Slip tool to slide the content inside the strip without moving it on the timeline, and since 5.1 Shift+S snaps groups of strips to the playhead.
Speed and retiming
The Speed control strip adjusts how fast a clip plays and since 5.1 it accepts negative values in Multiply mode to play backward; for segment pacing, retiming keys handle it.
Transitions
The classic VSE transitions are Cross (crossfade) and Wipe. Since 5.2 there are Compositor-based effects, so you can build custom transitions with nodes: two inputs and an effect fader going from 0 to 1 control the blend between clips.
A smooth timeline with heavy files: proxies, cache and prefetching
Proxies for heavy footage
For 4K footage or long clips, generating proxies creates lower-resolution versions that keep editing smooth; the final render always uses the original file. Proxies are stored on disk and apply to movie strips.
Cache and prefetching
The cache keeps already-decoded frames in RAM so playback does not re-read the file. Since 5.0 prefetching is enabled by default and since 5.2 it preloads five frames before the playhead. The cache speeds up every kind of strip, not just video.
Fewer frame drops at cuts (5.3)
The next Blender release, expected toward the end of 2026, will use a shared decoder pool so the codec is not reopened at every cut: fewer dropped frames during playback and less final render time on projects with many cuts.
Finishing: color and effects inside the Sequencer
Strip modifiers for a color pass
Every video or image strip can carry stacked color modifiers, just like modifiers on 3D objects: balance, curves and other corrections apply without destroying the original clip. In 5.0 they were reorganized into a dedicated panel, Strip Modifiers, with icons, search and drag & drop.
Compositor modifier and Compositor effect: nodes on the timeline
Since 5.0 a strip can carry a modifier driven by a Compositor node tree. Since 5.2 there are Compositor effect strips, with 0, 1 or 2 inputs plus a fader, for transitions and procedural generators, with GPU acceleration configurable under Render > Performance > Compositor and custom inputs exposed like in Geometry Nodes, ideal for saving the tree as an asset.
Scopes and composition guides
The preview includes a luma waveform, a vectorscope and a histogram to grade color and exposure. Since 5.2 the scopes support HDR and wide gamuts, with a logarithmic scale in nits and P3 or Rec.2020 gamuts, and the preview brings composition guides with the same options as the viewport cameras.
Video editing in Blender: export your final video
Render the Sequencer, not the scene
To get the edited video you render the Sequencer, not the 3D scene. Since 5.0, when the Sequencer Scene differs from the active scene, the Render menu adds Render Sequencer Image and Render Sequencer Animation options.
FFmpeg output format
In Output Properties, FFmpeg format: the MP4 container with H.264 for video and AAC for audio is the standard choice for YouTube or social media. For archiving at maximum quality you can use a lossless container. Since 5.1 the audio bitrate goes up to 2048 kb/s, previously capped at 384.
Render Audio with a progress bar
In 5.2 the Render Audio operator shows real-time progress and can be canceled; previously it froze the interface until it finished.
VSE or an external editor: when to use each
For your own renders: stay in the VSE
If your material is animation rendered in Blender, the VSE avoids the round trip: same file, no export to another program and no extra cost. With scene strips you do not even need to pre-render to review the cut. For a short film with cuts, audio and a color pass, it is more than enough.
When DaVinci Resolve or another NLE makes sense
For camera footage with professional pipelines the story changes: multicam, media pools, multi-clip proxies, color grading with qualifiers and power windows are the territory of dedicated editors such as DaVinci Resolve, which remain stronger in that production. The VSE does not replace the color page of a full NLE.
Moving the cut to another app
You do not have to choose once and for all: the VSE exports EDL and OpenTimelineIO, so a cut assembled in Blender can be opened in another editor for the final finish without rebuilding it.
Conclusion
Video editing in Blender with the Video Sequence Editor turns the render into a film without leaving the app: strips on the timeline, clean cuts, synced audio, proxies and a node-based color pass at the end. The 5.x series has turned it into a real finishing tool for people who live inside Blender. If you want to see the whole workflow in action, check the curated video tutorials on editing, rendering and post-production in the platform.