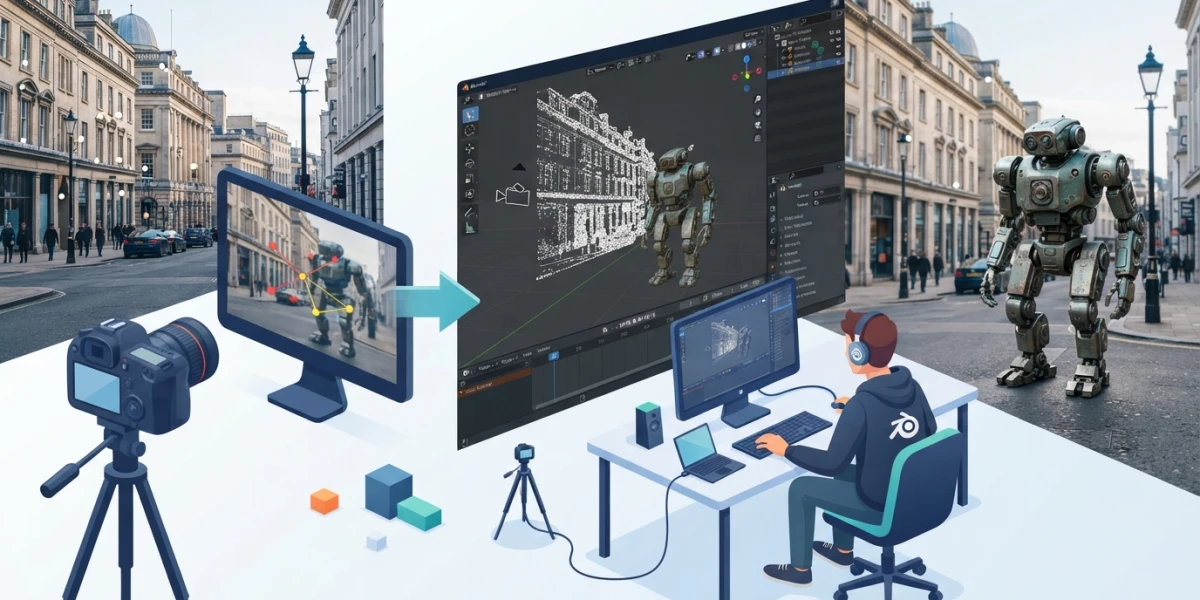
Image generated with AI
Blender Motion Tracking: Matchmoving Guide for VFX

Diego Cortés
Author
Matchmoving in Blender rebuilds the motion of the real camera: with motion tracking and a handful of markers, a CG object behaves as if it had been filmed in the shot. This walkthrough covers the full pipeline: footage, tracks, solve, orientation and compositing.
What Is Matchmoving and Why You Need It
The problem: integrating CG into real footage
To insert a 3D object into a video shot with a real camera, the CG element has to share the movement, the perspective and even the lens distortion of the clip. If the object does not replicate that visual trail, the eye catches it instantly and the illusion breaks. Matchmoving tracks the camera motion through the footage and recreates it in 3D, so you can insert CG elements with perspective and motion aligned with the live-action plate.
How Blender solves it
Blender's Motion Tracking system in the Movie Clip Editor combines 2D tracking with 3D motion reconstruction. You do not need to export data to another tool or pay for licenses: camera tracking, object tracking and plane track live in the same editor, together with lens calibration and the constraints that connect the solution to your Blender camera.
When you will use it
Matchmoving is the foundation of almost any composited VFX shot: inserting 3D objects into video, replacing screens and billboards, set extension, stabilizing shots and anchoring graphic elements to the real motion of the camera.
Preparation: Footage That Makes Tracking Easy
Parallax and texture: what the solver needs
The solver needs noticeable parallax between the keyframes: if the camera is almost static or only pans, there is no way to reconstruct depth. The points you track also need contrast and detail: flat areas, blurry regions or motion blur get lost quickly and drag the solve down.
Project setup
Make sure the project frame rate matches the frame rate of the video. Then open the Motion Tracking workspace from the top menu (plus button, VFX section) and load the clip into the Movie Clip Editor.
If you can shoot the footage yourself
Physical markers visible on the set make everything easier: high-contrast points that the detector finds without effort. For object tracking, keep at least 8 visible markers on the object, spread out so the solver gets depth information.
From Clip to Tracks: Adding and Tracking Markers
Detect Features: the quick start
The automatic feature detector gives you a first batch of tracks in one click. Three parameters matter: Threshold (low values produce features that will probably fail soon), Margin (the minimum distance to the frame border; markers stuck to the edge get lost fast) and Distance (the minimum distance between markers; tracks too close together confuse the solver).
Track Forward / Track Backward
Track the markers from a keyframe forward and backward with the Track Forward and Track Backward buttons. Review the tracks that drift away from the original point and re-track or delete them. Enable Blurry Footage if the clip is blurry.
Clean up before solving
Clean Tracks removes tracks shorter than N frames or with a reprojection error greater than X, and Filter Tracks selects tracks with suspicious motion spikes. Both operators live in the Track menu, Clean Up section.
Solving the Camera Motion with Motion Tracking
The solver's requirements
You need at least 8 common tracks in the two solve keyframes (Keyframe A and Keyframe B) and noticeable parallax between them. With fewer data points, the system cannot reconstruct the 3D position of the points and the result is unstable.
Solve Camera/Object Motion
The Solve Camera/Object Motion operator, in the Track menu, reconstructs the motion of the camera or of a tracked object using all the tracks in the clip: Blender computes the trajectory that best explains the observed 2D positions.
Reading the solve error
The reprojection error is the average distance between the reconstructed 3D position of each track projected back onto the footage and its original position. Reference values from the manual: below 0.3 is precise; between 0.3 and 3.0 the solve is quite good; above 3 you should track better or review focal length and distortion. As a practical rule, an error below 1 already counts as a successful track.
Orienting the Scene: Floor, Scale and Origin
Set Floor and Set Wall
With 3 markers selected, Set Floor transforms the camera so those points lie flat on Z=0, on the ground. Set Wall places them on the XZ plane, like a wall.
Set Origin and axes
Set Origin moves the scene origin to the active track, applying camera translation only. Set X/Y Axis places the active track on a specific axis while keeping the origin.
Set Scale: giving the world a real size
Without a defined scale, CG objects come in with arbitrary size: a one-meter cube can end up the size of a building. With two selected tracks and a real distance value (for example, 2 meters between two marks on the set), Set Scale scales the camera or the object. Apply Solution Scale keeps the scale applied permanently.
Lens calibration
The manual includes Manual Lens Calibration to adjust lens distortion. A badly configured distortion degrades the solve and shows up at the frame edges, where CG objects seem to breathe.
From the Solution to the 3D Scene
The Camera Solver constraint
The Camera Solver constraint makes a Blender camera imitate the motion of the real camera. The flow: load the video, track at least 8 markers, solve with Solve Camera/Object Motion and add the constraint to the camera. Its options include Active Clip, Constraint to F-Curve (which converts the constraint into keyframes) and Influence.
The Object Solver constraint
To anchor a 3D object to a specific track, use Object Solver: a cube that stands on a marker of the set or a sign that follows a point in the frame.
Rebuilding geometry from tracks
The Reconstruction menu offers tools to move from the solution into the scene: 3D Markers to Mesh creates a mesh from the reconstructed track positions, a starting point for modeling over the set; Link Empty to Track creates an empty anchored to the active track as a reference or parent for other objects.
Checking in camera view
Before compositing, check the camera view (numpad 0) with Set as Background to see the video underneath and confirm that the CG aligns with the set.
Advanced Matchmoving: Plane Track and Compositing
Plane Track for flat surfaces
With at least 4 tracks on a flat surface in the footage, Blender creates a flat object that deforms exactly like the surface, ideal for replacing billboards, screens or posters. The tracks do not have to sit at the corners: the more you add, the better the estimate.
Projecting content onto the plane
The Plane Track Deform compositing node projects an image or video onto the tracked plane, and the result deforms following the original perspective of the shot.
Tracking nodes in the compositor
Track Position and Stabilize 2D are the tracking nodes of the compositor: they are useful for stabilizing shots or reading the position of a track inside a node graph.
The final integration
The last stage combines the background footage with the CG render and the color and contact work: shadows, reflections and grain so the 3D element does not look pasted on. When the background is replaceable, green screen keying is the complementary path; matchmoving and chroma keying are used together in most real VFX shots.
Common Mistakes and How to Avoid Them
Too little parallax
An almost static camera prevents the solver from reconstructing depth. If the footage has no lateral movement or traveling move, the solve will be unstable or fail.
Tracking impossible areas
Flat surfaces without texture, highlights and motion blur do not provide reliable tracking points. Use a well-calibrated Detect Features and delete bad tracks.
Solving without cleaning up
Short tracks or tracks with spikes drag the solve down. Run Clean Tracks and Filter Tracks before solving.
Forgetting floor and scale
Without Set Floor the CG floats above the ground; without Set Scale the objects come in with arbitrary size. Both steps take seconds and save hours of correction.
Ignoring the lens
A badly calibrated lens distortion produces a high error at the edges and objects that breathe. Use the solve error as your thermometer.
Conclusion
Matchmoving is the invisible seam of almost all integration VFX, and with Blender the entire pipeline lives in one free program: footage, tracks, solve, orientation and compositing. Once you understand that the secret is preparing the clip well, cleaning the tracks and reading the solve error, the process becomes a repeatable workflow. To see these techniques in action, explore the curated VFX and motion tracking video tutorials on CGI Academy Hub.