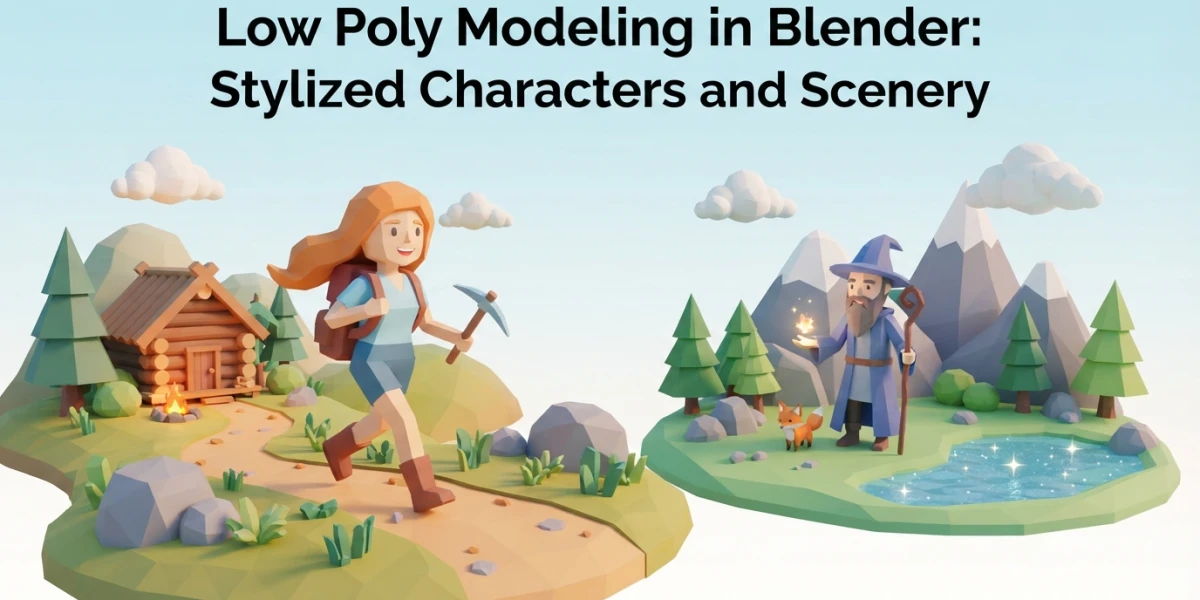
Image generated with AI
Low Poly Modeling in Blender: Beginner Guide

Diego Cortés
Author
Low poly modeling in Blender is not modeling with less detail: it is an aesthetic with its own rules, clean geometric shapes, few well-placed polygons and vibrant color. And it is the fastest way to finish a project that looks great: here is the full workflow, from blockout to render.
What the Low Poly Style Is and Why Use It
An aesthetic, not a technical limitation
The low poly style uses the minimum number of polygons needed for a shape to read clearly. Far from being an accident or a shortcut, it is a design decision: every face counts and the silhouette rules. The Low-Poly Scenes in Blender quick guide from Blender Base Camp describes it as a minimalist approach built from simple geometric shapes, and that is exactly its appeal: the result is clean, readable and full of personality, popular in indie games, portfolios and motion graphics.
Real advantages
It is not only a matter of taste. Low poly models render almost instantly, which makes them perfect learning material: every change shows up immediately, with no sampling waits. For games, they are lightweight assets that run on any device, an advantage Blender Base Camp sums up as efficient game asset creation with less computing power. And the workflow is much shorter than high poly: a complete project fits in an afternoon.
Low poly vs high poly
High poly chases realism and detail, usually through digital sculpting and millions of polygons that later need retopology to be animated. Low poly chases the opposite: readability and style with the fewest possible faces. If you come from the sculpting workflow, it helps to know the differences: in character sculpting in Blender and retopology in Blender the goal is a dense mesh for animation; here the goal is making the simple mesh look intentional.
Low Poly Modeling in Blender: The Workflow
Blocking out with primitives
Everything starts with base shapes. With Shift+A and the Mesh menu you add cubes, spheres, cylinders or UV spheres and assemble the model piece by piece, the same way a sculptor works on the overall volume first. The Blender Base Camp guide recommends starting precisely with cubes and spheres: they are the raw material of low poly and force you to think about shape before detail.
Edit Mode: extrude, scale and move
Press Tab to enter Edit Mode and the real modeling begins. Three shortcuts do ninety percent of the work: E to extrude new faces, S to scale and G to move. The idea is to sculpt the silhouette before the details: every extrusion adds shape, and if you keep the count low from the start, there is nothing to clean up later.
Joining and simplifying
When a character or a scene is made of several pieces, Ctrl+J joins the selected objects into one, a shortcut documented in the Base Camp guide. Join them once the piece is finished and inspect the mesh: orphan vertices and duplicate faces are the difference between a clean mesh and a medium-term problem.
Decimate: The Optimizer You Must Use Wisely
What the modifier does
The Decimate modifier reduces the number of vertices and faces in a mesh with minimal changes to its shape, according to the official Blender 5.2 LTS manual. It is an extremely powerful optimization tool and, like every powerful tool, easy to misuse.
When it actually makes sense
Here is the important warning, straight from the manual: Decimate is not usually used on carefully and economically modeled meshes, because every face there is necessary and the modifier only adds work. Its natural home is the result of complex modeling, digital sculpting or applied subdivisions: the typical case is a multi-million polygon sculpture turned into a low poly game mesh. In a hand-made low poly workflow, modeling with few faces from the start makes Decimate unnecessary.
Modes and settings
Collapse mode merges vertices progressively, taking the shape of the mesh into account. The Ratio parameter controls the reduction: 1.0 leaves the mesh intact, 0.5 removes half the faces and 0.0 removes almost everything. It includes Symmetry, Triangulate and Vertex Group options to protect specific areas. Un-Subdivide mode, on the other hand, undoes previous subdivisions. One manual detail worth remembering: the Ratio is calculated over triangles, so with quad meshes the remaining faces will be more than expected if Triangulate is disabled.
Shading: Making Low Poly Look Clean
Shade Smooth and Auto Smooth
Low poly has a classic shading problem: every flat face reads as a facet. Shade Smooth softens normals without adding a single polygon, and Auto Smooth limits that softening based on the angle between faces: areas that should look hard stay hard, and curves look smooth.
Weighted Normal for artifacts
When Auto Smooth is not enough and broken shadows appear on sharp angles, the community has a standard answer: combine Auto Smooth with the Weighted Normal modifier, as explained in the Blender StackExchange discussion about smooth shading on low poly. Auto Smooth only considers the angle between faces; Weighted Normal adds information about the mesh shape and usually fixes the artifacts the former leaves behind.
Flat color materials
Color is the great ally of the low poly style. Materials with solid, vibrant colors and no textures give that finished indie-game look. And so a scene does not look cloned, Ryan King Art's technique in his Low Poly Island series is using the Object Info node in the shaders: every object receives a slightly different tone of the same color, so each rock and each tuft of grass has its own variation without adding a single polygon.
From Scene to Render: A Low Poly Island
The guided scene
The best way to see all of this together is Ryan King Art's Low Poly Island series, three parts for beginners that end in an EEVEE render, featured on BlenderNation with project files on the author's site. The terrain is modeled from deformed primitives, the trees and rocks are composite pieces and the water is a plane with a simple material: none of it requires advanced techniques, just consistency.
Vegetation with Geometry Nodes
Grass is placed on the terrain with Geometry Nodes instancing, scattering small objects across the surface. There is no need for a complex node system: a point scatter with a couple of scale and rotation variations is enough to populate an entire island, and the result stays light to render.
Rendering in EEVEE
EEVEE is the ideal engine for low poly: solid colors, immediate lighting and near-instant render times. An optional bloom touch gives that soft finish so characteristic of low poly renders, and the style even holds up in the Workbench viewport. If you want to understand when EEVEE wins and when Cycles does, the EEVEE vs Cycles comparison breaks it down in detail.
Exporting to games
When the scene is ready, File > Export to .fbx or .obj takes the models into game engines; Blender Base Camp recommends these two formats for their universal compatibility. Before exporting, check the scale, confirm the normals point outward and that the materials have names: three details that prevent headaches in Unity or Unreal.
Guided Project: Model a Low Poly Character
The primitive base
To finish, a concrete project: a low poly character. The head comes from a cube or a UV sphere, the torso from a cylinder and the arms and legs from smaller cylinders. Enable the Mirror modifier to work on only half of the character while the other half mirrors automatically: the fastest way to guarantee symmetry.
Details by extrusion
Eyes, mouth and accessories come from extruding selected faces in Edit Mode. The style rule: if you need more shape, extrude; if you need more detail, change styles. Keeping the count low is what makes the character look truly low poly rather than simply unfinished. To take the style further, Grant Abbitt's detailed character workflow is an excellent reference.
From model to portfolio
With the model finished, apply flat color materials, set up three-point lighting and render in EEVEE. The three-point lighting guide in Blender explains how to place key, fill and rim lights so the character stands out. In less than an hour you have a portfolio piece that shows you master the complete workflow.
Conclusion
Low poly modeling in Blender is the perfect combination of learning and results: primitive blockouts, Edit Mode modeling with topology awareness, Decimate used only where it belongs, clean shading with Auto Smooth and Weighted Normal, vibrant color with Object Info and EEVEE rendering. It is an entrance into 3D that delivers nice-looking pieces from day one. To see the workflow in action and keep learning, CGI Academy Hub curates video tutorials on beginner modeling.