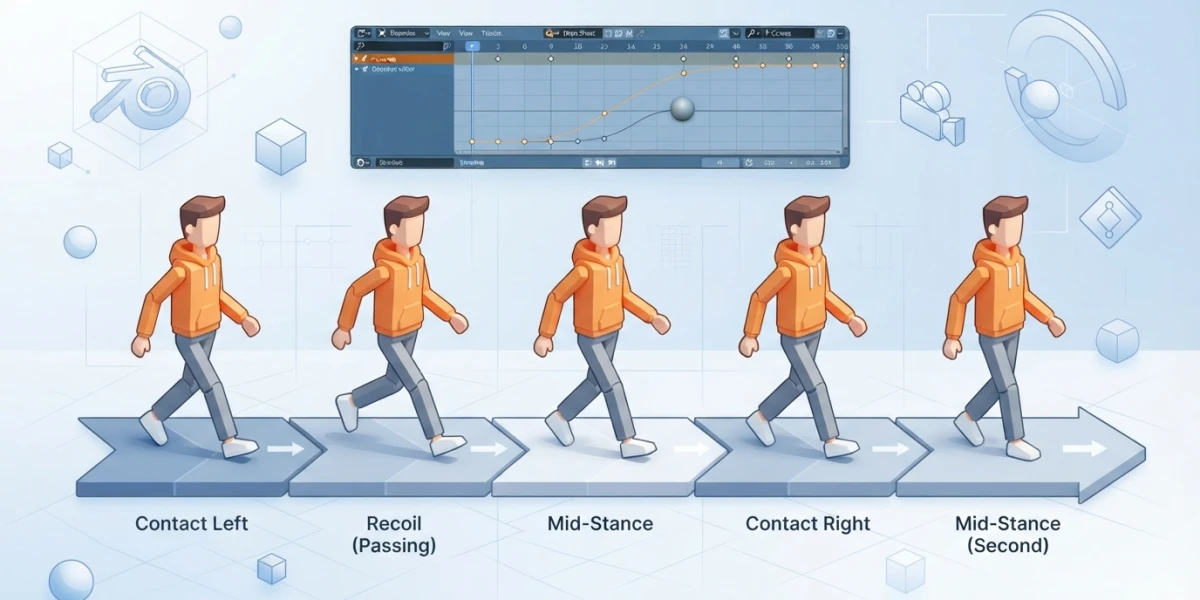
Image generated with AI
Walk Cycles in Blender: Character Animation Step by Step

Diego Cortés
Author
The walk cycle in Blender is every animator's exam: in twelve frames per step you play with poses, timing and curves, and the result shows instantly. Mastering the walk cycle gives you control over weight and naturalness that you will apply to any other character animation afterward.
Why the Walk Cycle Is Every Animator's Exam
A walk cycle concentrates in a few frames everything that makes a character feel alive: the balance shifting from leg to leg, the weight going down and up, the head staying level while the body works. It is the first serious character animation project in Blender because it forces you to master named poses, 24 fps timing and Graph Editor polish all at once.
What a Walk Hides: Balance, Weight and Personality
Each step is a controlled fall. The body moves forward, loses support and regains it with the opposite leg, and that mechanics reads in the pelvis: it is the bone that rules the whole cycle. A well-made walk cycle is not just fluid: it looks tired, cheerful or determined depending on how that pelvis moves and how the arms swing.
The Five Key Poses
Every classic walk cycle is built on five poses with proper names. Learning them in order is learning to read motion like an animator.
Contact: The Heel Touches the Ground
This is the frame where the heel of the leading foot touches the ground and the body starts receiving the weight. The back leg stays extended behind, about to push off. It is the most recognizable pose of the cycle and the one that sets the rhythm for everything else.
Down: The Weight Drops
The supporting leg bends and the pelvis descends to its lowest point. It is the moment of maximum absorption: the body prepares to push forward and the free leg passes beside the supporting one.
Passing: The Free Leg Passes
The free leg crosses beside the supporting leg while the pelvis rises again. It is the midpoint of the step and, together with the next pose, defines the character's verticality.
Up: The Highest Point
The supporting leg is straight, the pelvis reaches its highest point and the free leg moves forward preparing for the next contact. It is the moment of greatest energy in the cycle.
Reverse Contact: The Cycle Closes
It is the contact of the other foot: the opposite heel touches the ground and the cycle starts again. With this fifth pose the walk is complete and ready to loop.
Timing: 12 Frames per Step at 24 FPS
Timing is the invisible half of the walk cycle. At 24 fps, the cinema standard, one step lasts 12 frames and the full cycle, two steps, exactly 24 frames.
The 24-Frame Cycle and the Frame You Must Not Duplicate
The classic beginner mistake is copying frame 1 into frame 25 to close the cycle. If frame 25 is identical to the first one, the preview includes it and the loop produces a hiccup: a frozen instant that breaks the flow. The cycle must end on frame 24, and frame 25 is already the start of the next cycle.
Speed and Character: Slow Walk vs. Energetic Walk
Timing is not fixed: it is character. A tired walk lengthens the contact and slows the descent; an energetic one quickens the step and keeps the pelvis higher. As a comparison, a run cycle uses 6 frames per step and 12 per cycle: twice as fast, which is why it reads as running rather than walking.
Blocking the Cycle in Blender
With the poses clear, blocking is mechanical: pose the rig on the key frames and let Blender interpolate. For a 24-frame cycle, the poses go on frames 1, 7, 13 and 19, with frame 25 repeating frame 1 to check continuity.
Preparing the Rig and Posing on Key Frames
The Blender metarig, the basic human-shaped rig that Rigify generates, works perfectly for the exercise. Enable Auto Keying so Blender records every transformation, pose the four main poses on frames 1, 7, 13 and 19, and use the fifth pose to verify the cycle's symmetry.
The Pelvis Rules: It Goes Up and Down, Arms in Counterphase
While blocking, remember the golden rule: the pelvis goes up and down between the down and up poses, and the arms swing in counterphase with the legs. When the right leg moves forward, the left arm moves with it. Breaking that counterphase is what makes a walk look robotic.
The Graph Editor: From Poses to Motion
Blocking gives the poses; the Graph Editor gives the life. This is where motion stops being a sequence of postures and becomes curves with weight.
Automatic Tangents and Smooth Curves
With the poses blocked, select the rig's controls in the Graph Editor and apply automatic tangents: Blender smooths the curves and removes the sharp spikes between poses. The motion gains fluidity instantly, and any remaining spike is corrected by hand adjusting the curve handles.
Pre/Post Infinity: The Continuous Loop
To loop without copying keyframes by hand, enable Infinity in pre and post mode in the Graph Editor. Blender repeats the cycle indefinitely and the preview shows the continuous walk. Break tangents, which make linear zones in the curve without affecting the rest, are useful for fine-tuning specific details like the heel contact.
Adjusting the Pelvis Curve for Natural Bounce
The pelvis curve is the most important one in the cycle: it must describe a smooth wave with its lowest point at down and its highest at up. If the wave is too flat, the character seems to glide; if exaggerated, it looks like a spring toy. Fine-tuning that curve is what gives the natural bounce of the human body.
Final Polish: Weight, Arcs and Personality
The cycle already walks, but polish is what separates a correct exercise from an animation with character.
Arcs of the Feet and the Center of Gravity
The feet must describe smooth arcs: the free foot advances with the toe low and the heel rising, and the center of gravity follows a continuous arc instead of jumps. Check in the Graph Editor that no curve has corners: everything alive moves in arcs.
Overlap in Arms and Head
The arms do not move like rigid levers: they arrive a couple of frames after the shoulders, and the head stays level compensating for the body's motion. That overlap is what makes the walk feel organic instead of mechanical.
How Character Changes the Cycle
The same 24-frame cycle tells different stories depending on how you modify it: a villain's walk lowers the pelvis and delays the shoulders, a light walk raises the whole body and shortens the contact, a military march keeps the arms high and the pelvis fixed. Changing the pelvis curve and the arm timing completely transforms the character's personality without touching the poses.
Conclusion
The walk cycle in Blender is built in four steps: the five named key poses, the 12 frames per step timing at 24 fps, blocking the cycle on the rig and polishing in the Graph Editor with smooth curves and infinity. With that method, your first character will walk with weight and naturalness, and you will have the foundation to animate any other movement. At CGI Academy Hub you will find video tutorials on animation and rigging that go deeper into each stage with step-by-step projects.