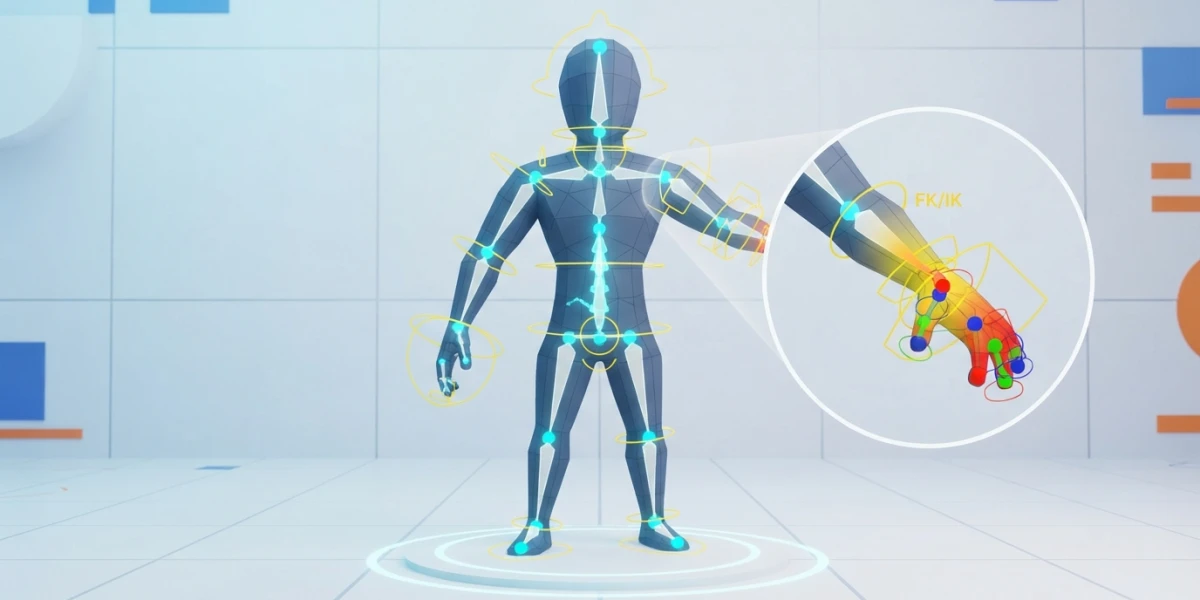
Image generated with AI
Maya Character Rigging: Beginner's Guide

Diego Cortés
Author
A modeled character in Maya is, technically, a sculpture of vertices. Maya character rigging (joints, skinning and controls) is what turns that sculpture into someone who walks, jumps and gestures, and this tutorial walks through the three phases using the real tools in the software.
What Is Maya Character Rigging?
Animating a mesh by moving vertices one by one is possible, but inefficient to the point of being unworkable in production. That is why rigs exist: a structure of joints and bones that works like a puppet, plus the relationship between that skeleton and the mesh (the skinning) and the controls the animator uses to move everything without breaking it.
From model to skeleton
A complete rig has three ingredients: the skeleton, made of joints connected in a hierarchy; the binding of the mesh to the skeleton, which decides how the skin deforms; and the controls, which make animation comfortable and predictable. Hierarchy and node naming are vital: clear names and a logical order let you automate processes and avoid headaches as the rig grows.
The three phases of the workflow
The workflow splits into three phases that always happen in this order: build the skeleton with joints, apply skinning with Smooth Bind and paint weights, and finally add the controls and constraints that make the rig usable. This article follows that order.
Phase 1: Building the Skeleton with Joints
Create Joints
With the Rigging menu set active (press F3), go to Skeleton > Create Joints. Each click places an articulation, and a bone appears between joint and joint; press Enter to finish the chain. If you need to adjust a position, middle-click the last joint placed and drag. The Snap to Projected Center option centers the joint automatically on the model, which speeds up placement considerably. The official Autodesk documentation covers the full command workflow.
Hierarchy, orientation and naming
Joints form a parent-child chain that starts at the root, usually at the pelvis or the base of the spine. Place joints over the model using the Front and Side orthographic views, and pay attention to axis orientation: a consistent orientation avoids problems during animation. Give every joint a descriptive name, for example arm_L and arm_R for the left and right arms.
Symmetry: duplicating chains
For the second limb you do not need to repeat the work: select the chain and duplicate it with Ctrl+D (the classic example in the official manual is a pair of legs). Then rename the joints on the other side with the matching suffix. Later, Mirror Skin Weights does the same for the weights.
IK vs FK
Here comes the first animation decision. In FK (forward kinematics) you rotate each joint in sequence, from parent to child: the natural choice for arcs and walk cycles. In IK (inverse kinematics) you move the end of the chain and the intermediate joints solve themselves: what you want when the position of the hand or foot rules, like throwing a ball or planting a foot on the ground. Neither is better than the other: it depends on the shot and the animator's style.
Create IK Handle
To add IK, go to Skeleton > Create IK Handle, click the start joint and then the end joint; the handle appears connecting both. Its behavior is configured in IK Handle Settings, where you pick the solver: single chain, rotate plane and other variants depending on what the limb needs.
Phase 2: Skinning with Smooth Bind
Bind Skin
With the skeleton ready, it is time to bind the mesh. Select the deformable object or objects and the root joint (or the parent joint of the limb) and go to Skin > Bind Skin. If you want to review the setup before applying, open the command options (Skin > Bind Skin > options) and adjust the parameters there.
Key bind options
Two options set the quality of the result. Max Influences controls how many joints can influence a single skin point: for a character, typically four or five. Dropoff Rate defines how influence decays with distance from the joint, and Bind Method decides how joints influence skin points during the initial bind. With Normalize Weights enabled, weights always distribute so they add up to one.
The candy-wrapper problem and dual quaternion
Classic linear skinning has a well-known flaw: when a wrist or elbow rotates around its axis, the volume collapses and the bow-tie or candy-wrapper effect appears. Dual quaternion skinning is designed to remove that collapse and preserves volume in those areas, as explained in the Autodesk guide to smooth skinning methods. You can pick the method when binding or blend both by zone: the Weight Blended mode combines linear and dual quaternion per joint, ideal when you want the best of each in different parts of the body.
Testing the bind
Before painting anything, exercise the skeleton: move the joints and watch the deformations. The official manual recommends exactly this, checking the binding by moving the skeleton, because a misconfigured bind shows up instantly and is better fixed before you invest time in the weights.
Phase 2b: Refining Weights with Paint Skin Weights
Paint Skin Weights Tool
The automatic bind is a good starting point, but it almost always needs adjustments. With the Paint Skin Weights Tool (Skin > Paint Skin Weights Tool, available in Rigging with F3 or in Animation with F4) you paint the influence intensity of each joint over the skin, just like painting in a drawing program. The shortcuts almost nobody knows the first time: B plus drag resizes the brush, and M plus drag changes the opacity.
The Influences list
The tool shows an Influences list you can sort alphabetically, by hierarchy or flat. Sorting by hierarchy is very useful when painting a specific area: nearby joints stay together and you do not have to hunt for them in a huge list.
Mirror Skin Weights
The paint tool has no reflection built in. To mirror weights from one side to the other use Skin > Mirror Skin Weights, which copies the weights from the painted side to the symmetrical one. That is why it pays to paint one half carefully and mirror afterwards.
Clean weights
The goal of the refinement is that no artificial creases appear when limbs bend. Meticulous weighting, area by area, avoids those folds that give away a rushed rig and makes the difference between a correct deformation and one that breaks the illusion, a concept the Animum 3D blog develops with practical examples.
Phase 3: Controls and Constraints
Controllers
The skeleton already deforms well, but nobody wants to animate loose joints. Controllers are simple shapes (circles, squares) linked to the joints and bones that let the animator control several bones at once, select the whole rig with one click and keep the outliner tidy.
Constraints
Constraints automate processes and protect the rig. You can limit position, rotation or scale, drive a character's gaze toward an object with a look-at, or lock the neck twist so the head does not spin 360 degrees. They are the difference between a fragile rig and one that survives daily use.
Blend shapes and the face
For facial expressions the skeleton is not enough: blend shapes are used, versions of the same model with identical topology and a different shape (a smile, a frown) that interpolate into each other. There are also corrective blends for problem areas, such as the elbow that rounds when it bends. A full facial rig deserves its own article; if you come from Blender, the facial animation with shape keys post is the conceptual equivalent in that software.
Shortcuts: Quick Rig
For humanoid characters, Maya includes tools that speed up the whole process, such as Quick Rig, which generates a complete basic rig in a few clicks. For quadrupeds or creatures, manually placing every articulation is still the way: the knowledge of joints, skinning and controls you have seen here is exactly what those automatic tools do under the hood.
Conclusion
Maya character rigging comes down to three phases: a well-named joint skeleton with IK or FK depending on the shot, a Smooth Bind with a thoughtful method and Max Influences, carefully painted weights mirrored with Mirror Skin Weights, and finally controllers with constraints that protect the rig. Master that workflow and you can animate any character, humanoid or not. If you want to see the equivalent in Blender, the character rigging in Blender article covers the same process in that software.
If you prefer to see it in motion, the platform has curated video rigging tutorials that complement this article, such as Must Have Free Rigs for Blender Animation and Rigging and Animating Tails, Whip and Chains in Blender the Easy Way.