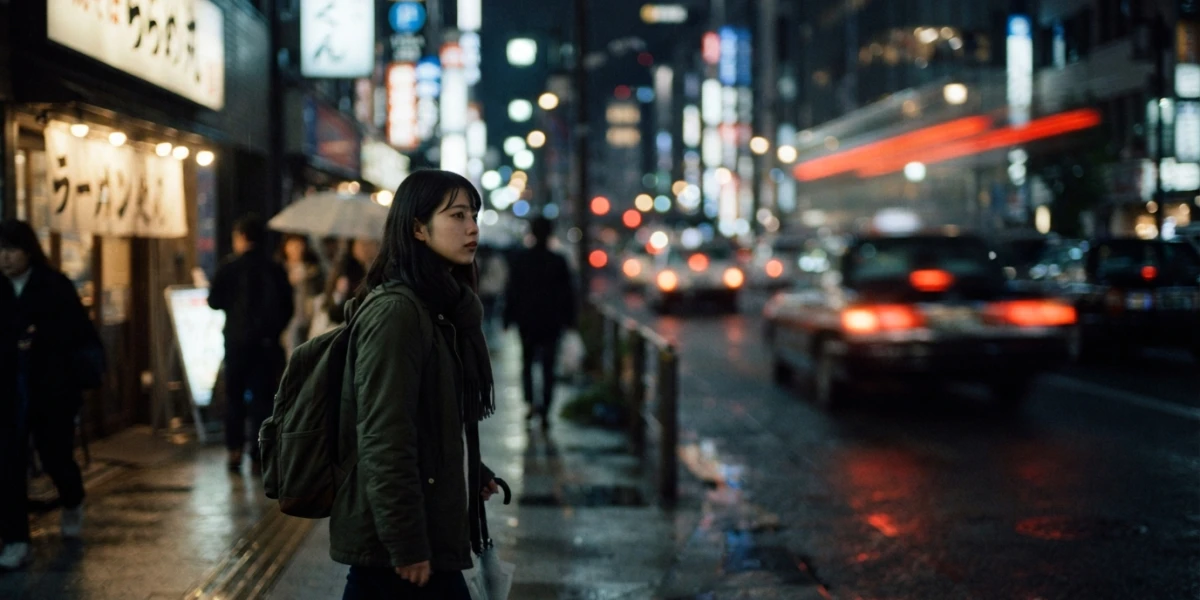
Image generated with AI
Blender Depth of Field: Realistic Bokeh & Motion Blur

Diego Cortés
Author
Do your renders look frozen, too clean? A real camera never focuses on the whole frame nor freezes motion completely. Learning to use depth of field in Blender together with motion blur separates an amateur image from one that looks captured with a cinema camera.
The camera has its depth of field panel and the render has its motion blur section. This guide explains what every parameter does and finishes with starting values for Cycles and EEVEE.
Why Your Renders Look Frozen (and How a Real Camera Fixes It)
A default render comes out sharp from horizon to horizon and without a single motion trail. A real camera never captures that way: the lens only focuses at one distance and the shutter opens over an interval of time. 3D can simulate both limits, and that is what this tutorial does.
Depth of Field: a Lens Focuses at One Distance
When a lens focuses on a subject, everything at that distance comes out sharp and the rest blurs progressively. That area is called the focal point and its extension depends on the aperture: just like when you look at something close and the background turns into a soft gradient.
Motion Blur: the Shutter Captures an Interval, Not an Instant
The shutter does not freeze a single instant: it captures light during a lapse, and if something moves in that lapse, the movement draws itself as a trail. In cinema, the 180 degree rule keeps the shutter open for half of the frame: at 24 fps that means 1/48 of a second, which in Blender translates to a shutter of 0.5 frames, the default value.
Blender Depth of Field: Focus, Aperture and Bokeh
The first effect lives in the camera properties: select your camera, open the camera tab and scroll to the Depth of Field panel. There you decide what should be sharp and how strongly the rest blurs.
Choosing the Focus: Focus Object vs Focus Distance
Focus Object lets you pick a scene object, for example an empty over the subject, and Blender keeps the focus following it even if the camera moves; when you use it, the manual distance is disabled. Focus Distance stores an exact value in meters, ideal for static shots.
Measuring the Focus with the Depth Picker
If you do not want to guess meters by eye, use the Depth Picker, the eyedropper icon next to the property. You can also hover over Focus Distance, press E and click on a viewport point to sample the real distance.
Aperture: Lower F-Stop, More Blur
F-Stop works like on a real camera: f/1.8 produces strong blur and f/11 barely blurs anything. For a close-up with a blurred background start at f/2.8 or f/4; if you need the whole plane sharp, go up to f/8 or beyond.
Bokeh Shape: Blades, Rotation and Ratio
Below F-Stop sits the bokeh shape. Blades sets the number of aperture blades: with 3 the bokeh comes out triangular, and with 5 to 8 it approaches the soft circle of modern lenses. Rotation spins them and Ratio stretches the bokeh to simulate anamorphic lenses: 1.0 has no distortion, below 1 it stretches horizontally and above 1 vertically.
Previewing the Effect in the Viewport
To preview, enable Show Limits in the camera Viewport Display: a draggable yellow cross appears marking the focus distance. Note that the blur only shows in camera view.
Turning On Motion Blur in the Render
The second effect lives in Render Properties, Motion Blur section, and works the same in Cycles and EEVEE: any element moving between frames drags a trail proportional to its speed.
Position: When the Shutter Opens
Position controls the moment of the opening relative to the frame: Start on Frame opens at the beginning, Center on Frame centers the exposure and End on Frame closes it at the end. For most animations Center is the most natural value because it spreads the trail on both sides of the frame.
Shutter in Frames and the 180 Degree Rule
Shutter measures the exposure in frames. The default 0.5 matches the 180 degree rule and gives natural blur at 24 fps. With 1.0 the shutter sweeps a whole frame, ideal for exaggerated trails; between 0.25 and 0.35 you get a drier look for fast action.
Shutter Curve: a Custom Shutter
Shutter Curve lets you draw the opening and closing of the shutter over time: the X axis is time inside the frame and the Y axis goes from 0 (closed) to 1 (open). The default opens and closes instantly; a progressive curve softens the start of the trail.
Per-Object Motion Blur
Not everything should drag a trail. Every object has its own motion blur toggle in Object Properties, Motion Blur tab. If a background element smears the frame, disable blur only for that object.
Bake Simulations Before Rendering
Particles and physics must be baked before the render: if the blur depends on an unbaked simulation, each frame computes different trajectories and the trail comes out inconsistent.
Rolling Shutter in Cycles
Cycles also includes Rolling Shutter, the scanning shutter effect of CMOS cameras that bends propellers in fast shots. Choose None or Top-Bottom and control its duration: at 0 you get pure rolling shutter and at 1 pure motion blur.
Cycles vs EEVEE: Where Settings Differ
Both engines produce the same effects, but they compute them differently, and that changes which controls you find.
Cycles: Ray-Traced Depth of Field
In Cycles depth of field is physical: rays leave the camera with the real aperture and the blur is computed exactly, with no extra render panel. Motion blur uses the panel already described. Limitations: camera motion blur does not work with orthographic cameras and moving lights do not generate blur: Cycles treats them as static during the frame.
EEVEE: Post-Process Depth of Field
EEVEE simulates the effect with post-processing over a pinhole image, and since Blender 4.2 it adds a sample-based method. Jitter Camera randomizes the camera position per sample: it smooths the bokeh but raises the real sample count. Overblur scales the blur to hide artifacts at the cost of softening the bokeh, and Max Size limits the size in pixels; at 0 the post-process is disabled.
EEVEE: Accumulation Motion Blur
EEVEE motion blur works by accumulation: Steps defines how many times the scene is re-evaluated inside the frame; more steps, more precision and more time. Max Blur limits the trail pixels as an optimization and Bleeding Bias stops the background from bleeding over the foreground. In the viewport it uses a simpler algorithm; the final render is the high-quality one.
Starting Values and Fine-Tuning
These are the values I use to start every scene and adjust afterwards depending on what the shot tells.
Shutter Based on the Action
Scene at 24 fps with natural movement: shutter 0.5. Fast action that needs sharp frames: 0.25 to 0.35. Stylized or exaggerated trail: 1.0.
Aperture Based on the Shot
Portrait or product with a separated background: f/2.8 to f/4. Interiors or architecture where everything must read sharp: f/8 to f/11. If you cannot see the blur, lower the F-Stop before touching the focus distance: a wrong distance is the most common cause of a DOF that does not show.
Animated Rack Focus
To change the sharp subject inside a shot, the rack focus, animate the Focus Distance or move the Focus Object empty over time. The viewer will follow the gaze to the focused element almost without noticing.
Common Mistakes and Fixes
These are the most common failures when enabling both effects, with their direct fix.
Everything Stays Sharp with DOF Enabled
F-Stop is too high or the Focus Distance sits far from the subject. Lower the aperture or bring the focus closer with the Depth Picker.
Weird Bokeh Shapes or Noise
Fewer than 3 Blades disables bokeh. In EEVEE raise samples or Jitter Camera, and use Overblur if artifacts appear.
Motion Blur Is Invisible
Shutter at 0, disabled panel or a single static image: blur needs movement between frames.
Orthographic Cameras Have No Camera Motion Blur
In Cycles it does not work with orthographic cameras. Switch to perspective or move the objects to fake the sweep.
Moving Lights Do Not Generate Blur
That is expected Cycles behavior. Move an emissive object instead if you need the trail.
Unbaked Physics and Particles
The blur comes out inconsistent between frames. Bake the simulation before rendering.
Conclusion
Depth of field and motion blur are the final layer of realism that sells an animation: selective focus directs the viewer gaze and the trail communicates speed and weight. With these starting values and a per-scene adjustment, your renders will stop looking frozen. If you want to see these effects applied in real projects, explore the curated video tutorials of CGI Academy Hub, reviewed one by one so you can learn without distractions.