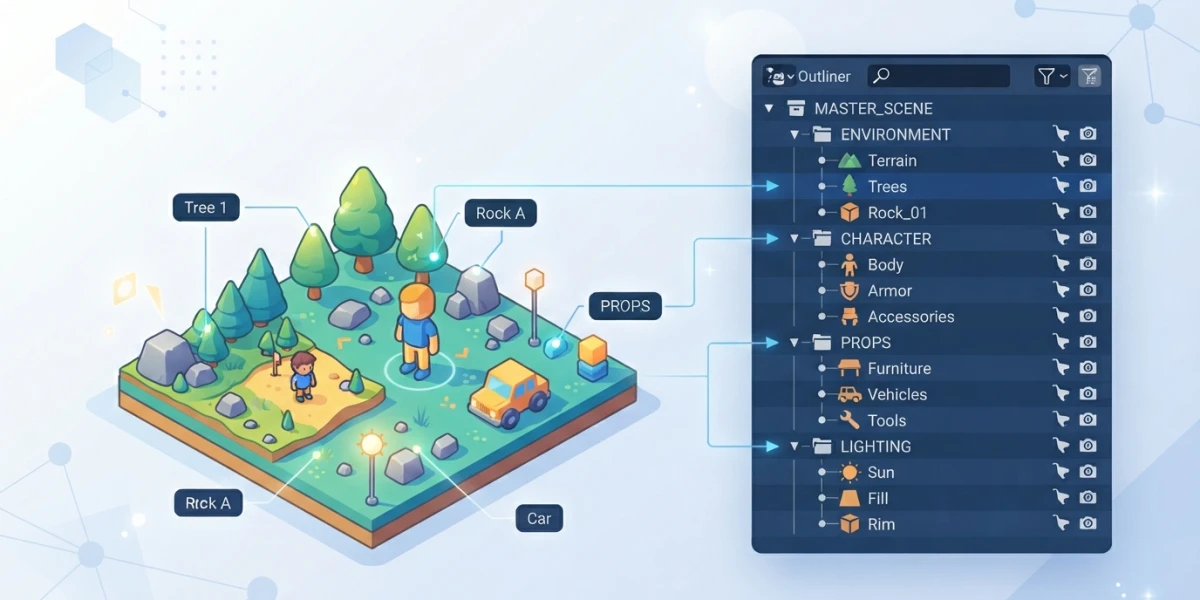
Image generated with AI
How to organize a 3D project in Blender: collections guide

Diego Cortés
Author
Once a scene passes ten objects, finding something in the viewport takes longer than modeling it. Organizing a 3D project in Blender with collections and the outliner separates a manageable file from a mess of hundreds of loose objects: here is the full workflow in 5.2 LTS.
Why a scene gets messy (and what collections are)
In Blender, objects do not live directly inside scenes: they are stored in a main database, the blend-file, and referenced from there by as many scenes as you want. When an object becomes part of a scene, it enters the scene collection, the root collection that holds everything in that scene. The mess appears because nothing forces you to use your own collections: you can leave loose objects hanging from the root and Blender will not complain, but you will.
Collections are not parenting
Grouping objects into a collection creates no transformation relationship. Parenting makes a child follow its parent in location, rotation and scale; putting two objects in the same folder only organizes them. They are independent: a collection orders the file, a parent defines movement.
One object can live in several collections at once
The model works like a Venn diagram: every object belongs to the scene collection, but it can also be part of several of your own collections at the same time. That lets you share an element between variants or views without duplicating geometry.
The outliner: the tree of your file
The outliner shows the contents of the blend-file as a tree and is the command center of this workflow. From it you get an overview of the scene, select and deselect objects, make them invisible or non-selectable in the viewport, exclude them from renders, duplicate or delete them, and manage parents and collections.
Display modes: View Layer, Scenes and Blender File
The selector in the header changes what the tree shows. View Layer displays the collections and objects of the active view layer in the current scene; Scenes shows everything through the scenes; Blender File lists every data-block in the file, with a shield icon that reports the user count and lets you add or remove fake users. There are also Video Sequencer, Library Overrides, Unused Data (for purging data-blocks) and Data API modes.
Search and filter: Ctrl+F and the funnel options
The search box filters the tree by substring: Ctrl+F focuses it and Alt+F clears it, with options for exact match and case sensitivity. The funnel icon adds powerful filters: show only collections, only objects, objects by state (visible, selected, active or selectable), object contents and children, or filter by type such as meshes or lights.
Build the hierarchy: names and nested collections
Just as system folders can contain subfolders, collections can be nested: a "house" collection can contain "bedroom", which in turn holds "furniture" with the bed and the wardrobe. The whole hierarchy hangs from the scene collection, so the structure you build becomes the index of your project.
Names that explain themselves
This is not a program rule but a workflow recommendation: use short, descriptive, consistent names, with prefixes by type or by area if the project calls for it, so the tree reads like an index. Renaming in the outliner is immediate: press F2 or click on the name.
Color tags to read the scene at a glance
Each collection can carry a color assigned with the Set Color Tag tool in the outliner or from the context menu. The tag shows on the collection icon inside the tree and in several interface menus, and the available palette comes from the theme. With a color convention per category, one glance tells you where everything is.
Organize with drag and drop
The outliner lets you reorganize, link and parent directly by dragging. Dropping an object onto another collection moves it into that folder; dragging with Ctrl links it, so it becomes part of several collections at once; and dropping an object onto another one parents it.
Parenting from the outliner
Dragging one object onto another makes it a child. If you hold Alt while dropping, the child keeps its world position and does not get locked to the parent transform; Shift lets you parent objects that live in another collection. Dragging a child out of the hierarchy clears the parent relationship.
Duplicating from the tree and to the viewport
Dragging an object from the outliner into the 3D Viewport creates a copy with its own data; dragging a data-block, say the mesh, creates a linked duplicate that references the original data. You can also reorder or copy modifier and constraint stacks by dragging them onto other objects.
The outliner's restriction toggles
On the right of each collection, object, bone, modifier or constraint sit restriction icons: invisibility, non-selectable, non-renderable and more. Only a few show by default; the funnel lets you enable more columns.
Hide in Viewports vs Disable in Viewports
Hiding (Hide in Viewports, with H and Alt-H in the viewport) only affects the viewport of the current view layer, and the object is still evaluated and part of the scene. Disabling (Disable in Viewports) removes it from the viewport in all view layers, stops evaluating it (better performance) and survives Alt-H, so it works for long-term invisibility.
Disable Selection and Disable in Renders
Disabling selection prevents you from accidentally clicking reference images or support objects. Disabling renders hides elements that must not appear in the final image, such as rigs or helper cameras, without touching what you see in the viewport.
Shift and Ctrl shortcuts on the icons
Shift-LMB on an icon applies the toggle to the element and all its children. Ctrl-LMB on a collection icon enables that collection together with its parent and child collections and disables the rest, and a second click re-enables them all: the equivalent of "only this collection".
View layers: organize the render too
Each collection is configured per view layer in Collection Properties: organizing the file translates into render control. You can include or exclude it from each output, mark it as holdout, or limit it to indirect effects.
Include and Exclude per collection
Removing a collection from the active view layer excludes it from the render, the viewport and the outliner for that view layer. That is the foundation for rendering variants of the same scene or isolating elements that are later combined in compositing.
Holdout and Indirect Only (Cycles)
Holdout turns the objects in the collection into fully transparent regions in the render, ideal for cutouts or for separating background and foreground. Indirect Only, available in Cycles, keeps the collection from appearing directly while still contributing light, shadows and reflections, the classic trick for clean product shots with realistic ambient lighting.
Duplicate, instance and link collections
The context menu of a collection lets you create a new one, duplicate the whole collection with all its data (Duplicate Collections), duplicate it linked while reusing the objects' data-blocks (Duplicate Linked), or instance it into the scene (Instance to Scene) to reuse it without copying geometry. Through Object > Collection you can also move objects with M, link them with Shift-M or create a new collection with Ctrl-G.
Taking collections to another file
File > Link/Append brings a collection in from another blend-file. And in Collection Properties, each collection can have exporters configured (glTF, USD, OBJ, Alembic, FBX and more) to re-export the same asset over and over without repeating steps, great when you iterate a look for games or maintain pipeline assets.
How to organize a 3D project in Blender: a sample workflow
With all the pieces on the table, a common structure that works as a starting point looks like this: collections by type (props, characters, lights, cameras) or by area or scene when the project calls for it, nested when subgroups appear; color tags per category to read the tree at a glance; helper lights and cameras with renders disabled; and one view layer per output, using exclude to isolate what each render needs.
From the practice scene to the production file
The same workflow scales. What is tidiness in an exercise becomes performance in a production file (disabled objects are not evaluated) and render control (collections per view layer). That is why it pays to apply the discipline from the very first object: when the file grows, it is already organized.
Conclusion
Learning how to organize a 3D project in Blender with collections and the outliner turns the file into a control panel: clear hierarchy, visibility under control and layered renders without fighting the scene. If you want to see the workflow in action with artists working on real scenes, explore the curated video tutorials on scene management and rendering on the platform.