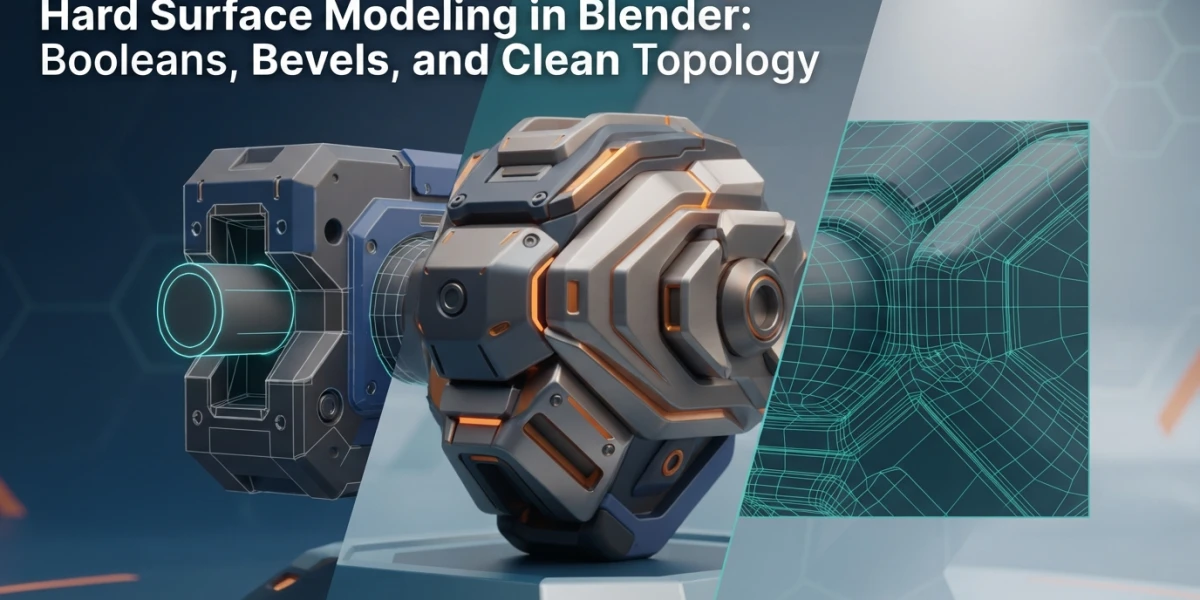
Hard Surface Modeling in Blender: Booleans, Bevels and Clean Topology

Diego Cortés
Author
Hard surface modeling in Blender is the discipline of mechanical parts: sci-fi props, vehicles and weapons with crisp edges that must look studio-designed. With booleans, bevels and clean topology, basic primitives become believable pieces without paid add-ons.
What Hard Surface Modeling Is
Hard surface is the name given to modeling hard objects: flat surfaces, precise chamfers, repeated mechanical details and silhouettes with defined edges. It is the style that dominates prop design for film, video games and product visualization, and in Blender it relies on a very specific combination of tools: the Boolean modifier to cut complex shapes, the Bevel modifier for chamfers, and topology planned so that subdivision does not ruin the result.
Hard Surface vs Organic Sculpting
Organic sculpting forgives messy meshes: you can leave triangles and n-gons in areas nobody will see because the form is built through volume. Hard surface exposes everything. Every badly resolved boolean leaves a visible scar on the normals, every mismeasured bevel betrays the amateur, and an edge that bends where it should not breaks the illusion of a manufactured part. That is why the workflow puts so much emphasis on cleanliness: in a hard piece, the mesh is part of the final result, not a means to get there.
The Non-Destructive Boolean Workflow
The foundation of modern hard surface work is non-destructive modeling: you stack modifiers on a base mesh and the result can be adjusted at any time. The Boolean modifier combines two meshes with a boolean operation, and it is the tool used to cut holes, join parts and generate intersections that would take hours by hand.
The Three Boolean Operations
The modifier offers three modes. Difference subtracts the operand object from the base: this is what you use to punch a hole or trim a shape. Union merges both objects into one, ideal for welding separate parts together. Intersect keeps only the area where the two objects overlap, perfect for creating clean intersections between volumes. The object performing the cut is known as the boolean object and can be hidden from view without affecting the modifier.
Booleans Inside Edit Mode
For one-off cuts without leaving edit mode, Blender includes the Intersect (Boolean) operation in the mesh menu. You select the faces you want to trim, run the operation against another object and get the cut applied directly to the geometry. It is a faster path when you know you will not need to readjust the cut later.
The Bool Tool Add-on
If you use booleans constantly, enable the Bool Tool add-on from Edit > Preferences. It adds shortcuts for the three operations and lets you apply them with a couple of clicks instead of creating modifiers by hand. It is free, ships with Blender, and is the recommended first step before looking at commercial solutions.
Bevel: The Detail That Makes a Piece Believable
An object with perfectly hard edges looks artificial: light has nothing to catch and the silhouette reads like a cardboard cutout. The bevel adds chamfers or rounded edges, and those small angled planes are what produce the edge highlights that make a piece look real.
Key Bevel Modifier Settings
The Bevel modifier is controlled by three main values. Width defines the size of the chamfer. Segments controls how many subdivisions the bevel has: more segments mean more smoothness and a more convincing curve. And the Angle Limit method bevels only edges that exceed a certain angle, letting you protect edges that must stay sharp while chamfering the rest automatically.
Profile and Custom Profiles
The Profile parameter decides the shape of the bevel. The profile ranges from convex to concave: a value of 1 gives you a full round, while 0.5 produces a straight 45-degree chamfer. You can also draw a custom curve on the profile widget: the widget control points are sampled according to the modifier's segment count, so the more segments you use, the more faithful your custom profile will be to the stroke you drew.
Non-Destructive by Nature
Like every modifier in the workflow, the bevel does not alter the base geometry until you decide to apply it. You can change the width, add segments or remove the modifier entirely at any moment, turning the chamfer into a revisable decision instead of an irreversible step.
Subdivision Surface and Edge Control
Subdivision Surface smooths the mesh and raises the quality of curved surfaces, but applied without control it also rounds the areas that must stay hard. The answer is support loops: extra edge loops placed around details that tell the subdivision where to stop.
Support Loops Around the Detail
When you subdivide a piece with holes or chamfers, add edge loops right next to those details. The subdivision smooths between the loops but respects the protected area, and the result is a piece where curved surfaces and sharp edges coexist in the same mesh. That balance is what separates an amateur model from a professional one.
Bevel Weights as an Alternative
Instead of modeling support loops by hand, you can assign bevel weights to edges: a per-edge weight value that the Bevel modifier reads when configured to use it. This lets you mark which edges should be beveled and how strongly, without adding extra geometry, and keeps the control centralized in the modifier.
Clean Topology After the Boolean
The boolean is powerful and messy in equal measure. Every operation leaves n-gons, triangles and loose edges in the cut area, and that geometry breaks normals, deforms subdivision and causes shading artifacts in the render. Cleaning up is not optional: it is the step that turns a functional cut into a publishable result.
What a Boolean Leaves Behind
When two meshes intersect, the contact area gets triangulated and n-gons appear on flat faces. If you leave that geometry, subdivision will produce unpredictable creases and shading artifacts will give the operation away. It is the same problem addressed in retopology: the mesh must be rebuilt with quads and a logical edge flow.
Cleaning the Cut Area
After every boolean, review the cut area: remove duplicated geometry with Merge by Distance, weld vertices and rebuild the problematic faces by hand. For small parts a few minutes of local retopology is enough; for large pieces it pays to plan the cuts so they land in areas where cleanup is straightforward. The cleaner the mesh before subdividing, the fewer surprises in the final result.
The Workflow for Game Art
In game art, modeling does not end with the shape: it ends with a polygon budget. Real-time meshes must look good with as little geometry as possible, and hard surface shines there because its rules match the studio pipeline.
Polygon Budget
Every polygon counts when the scene renders in real time. Studios work with strict topology rules: quads whenever possible, density concentrated where there is detail, and flat areas with minimal geometry. Modeling hard surface with that mindset from the start avoids painful retopology at the end of the project.
Hard Edges and Normals
Hard edges do not always need extra geometry: normal smoothing angles let an edge look sharp without adding loops. Adjust Auto Smooth or per-edge angles to control which borders render hard and which render soft, and you get the mechanical look with a fraction of the polygons.
Add-ons That Speed Up the Loop
Blender's native workflow is enough for professional pieces, but the boolean-bevel-cleanup loop speeds up dramatically with specialized extensions.
Hardflow, the Free Option
Hardflow is a free extension with a GPLv3 license for Blender 4.2+ that covers the entire loop: hand-drawn booleans (draw-to-cut), precision snapping, direct modeling, curves, decals and kitbash assets. It is the open-source alternative to commercial suites and the first add-on worth installing if hard surface will be a regular part of your work.
Bool Tool and Commercial Options
Bool Tool covers the basic shortcuts at no cost, and above it sit commercial suites such as BoxCutter and HardOps, very popular in tutorials for their speed and direct modeling integration. They are paid options worth knowing about, but none is essential for learning the workflow.
Conclusion
Hard surface modeling in Blender is not a trick or an add-on: it is a flow of decisions —booleans to cut, bevels to add credibility and clean topology as a safety net— that you learn piece by piece. Start with a small prop, run the full loop and review the result with studio eyes: the difference between a hobbyist and a professional lives exactly there. If you want to see the process in action, the platform's video tutorials cover modeling, texturing and rendering of props from start to finish.