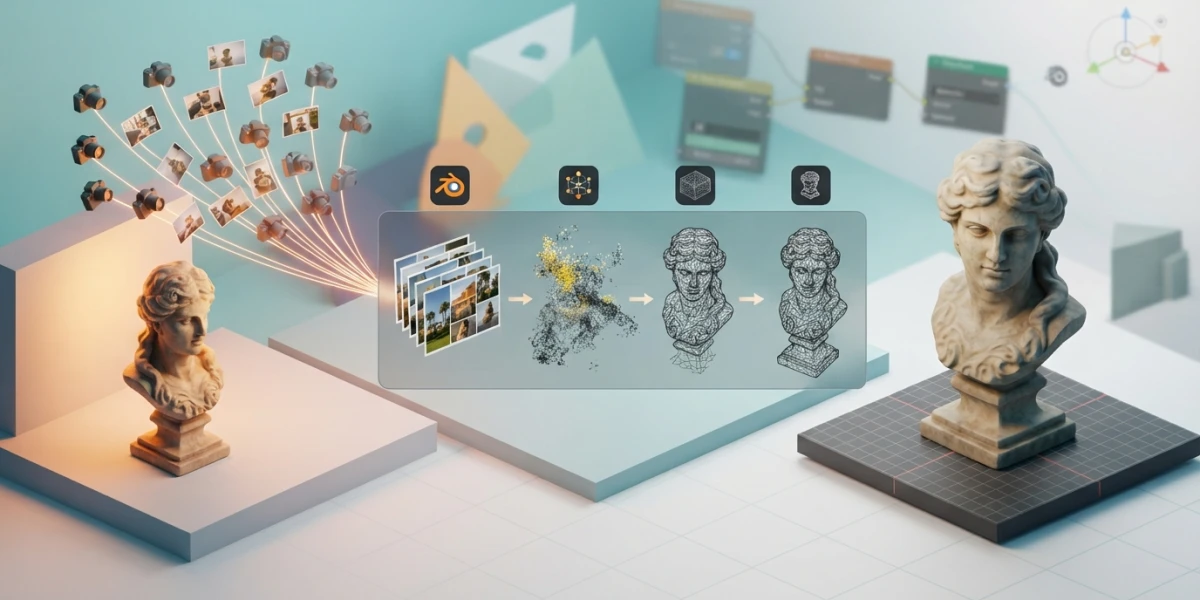
Image generated with AI
Photogrammetry in Blender: from photos to 3D models step by step

Diego Cortés
Author
That object sitting on your desk can become a textured 3D model using nothing more than a phone, free software and Blender. Photogrammetry is no longer a lab-only technique: here is how it works.
What is photogrammetry and how does it work?
Photogrammetry is the science of making measurements from photographs. For a 3D artist, it means taking many photos of an object from different angles and letting software compute its shape. The process rests on two ideas: the algorithm detects common points between overlapping photos, a stage known as Structure from Motion, and from those points it reconstructs the geometry and then the texture.
Overlap between photos is the foundation of everything. Every point on the object must appear in several images so the software can triangulate its position in space. The more photos share a given area, the more reliable the reconstruction.
Phase 1: capturing with your phone
You do not need a professional camera. A modern phone is enough if you follow a few rules during capture.
Camera settings
Use the highest resolution available, usually 12 megapixels or more. Lock the focus by tapping and holding on the object, so the camera does not refocus between shots, and fix the exposure so brightness does not change as you walk around the piece. If exposure varies, the algorithm struggles to match points.
How many photos and how much overlap
Walk around the whole object in passes, with generous overlap between consecutive photos, around 60 to 80 percent. Avoid featureless areas and shiny or mirrored surfaces: reflections change with angle and confuse the algorithm. Uniform, diffuse light is your best ally because it produces few hard highlights.
Matte objects with detail work best. For difficult surfaces, such as glossy plastic parts, professional scanners use matting powder to reduce reflections; at home, a little talcum or matte spray does a similar job.
Phase 2: reconstruction with Meshroom or COLMAP
Reconstruction happens outside Blender, with free and open-source tools. Meshroom, the AliceVision pipeline, is the most visual option: it organizes the process into nodes that run by themselves. COLMAP is the more technical alternative, widely used in research. Agisoft Metashape is the commercial option when you want more automation.
The ConvertSfMFormat node
Meshroom has a quirk worth knowing before you start: by default it saves the Structure from Motion result as an .abc file that Blender cannot read directly. You need to add a ConvertSfMFormat node to the graph to export the .sfm/.json format that the import add-on understands. You can also import the .mg project, which keeps meshes and textures. Always save the .mg project: it is your working copy.
When done, export the dense mesh with its textures as OBJ, glTF or PLY. That file is the bridge into Blender.
Phase 3: importing into Blender
There are two ways to bring the scan into Blender: the native PLY importer or the specialized photogrammetry add-on.
Direct PLY import
Blender imports the Stanford PLY format, ASCII or binary, with support for vertex colors in sRGB or linear color space. It is the quick path for point clouds and colored meshes, with no extra installations.
The Photogrammetry Importer add-on
The SBCV Photogrammetry Importer add-on supports Blender 5.0.2 and later, and understands results from Metashape, COLMAP, Meshroom, OpenMVG, Open3D, OpenSfM, Regard3D and VisualSFM, plus point clouds in PLY, PCD, LAS/LAZ, ASC, PTS and CSV. One of its most powerful features is importing animated cameras with the background photos and image planes, which require Cycles to display. Point clouds can be represented with particles or Geometry Nodes so they can be rendered.
If you import an OBJ and the orientation does not match, set Forward = Y and Up = Z in the import options; that is the convention used by most scanning tools.
Phase 4: cleanup and retopology
A raw scan is noisy: it brings holes, floating geometry and background leftovers that slipped into the photos. Cleanup starts by trimming the excess and filling gaps with tools like fill holes, remesh or a bit of corrective sculpting.
Then comes retopology: rebuilding the surface with a clean, efficient mesh, suitable for animation or rendering without surprises. It is the same process applied to any sculpt, and on the retopologized mesh you unwrap UVs to receive the scan textures or new ones.
Phase 5: texturing and final render
The scan textures are usually a good starting point, but they do not always have the resolution or cleanliness a final render needs. You can reuse them as they are or re-texture with PBR materials and bake the details from the original mesh onto the retopology, a step that fits the texture baking workflow. The final scene is assembled with HDRI lighting to place the object in an environment with believable reflections and lights.
Conclusion
A phone, Meshroom and Blender are enough to fill your library with digitized real props, from a sculpture to an object on your workbench. The whole flow, capture, reconstruction, cleanup and render, is within reach of any artist using free software. If you want to see the process in motion, the curated video tutorials on the platform about modeling and VFX give you more context for your next scans.