Geometry Nodes Landscape Scattering: From Distribute Points to Scatter on Surface

Diego Cortés
Author
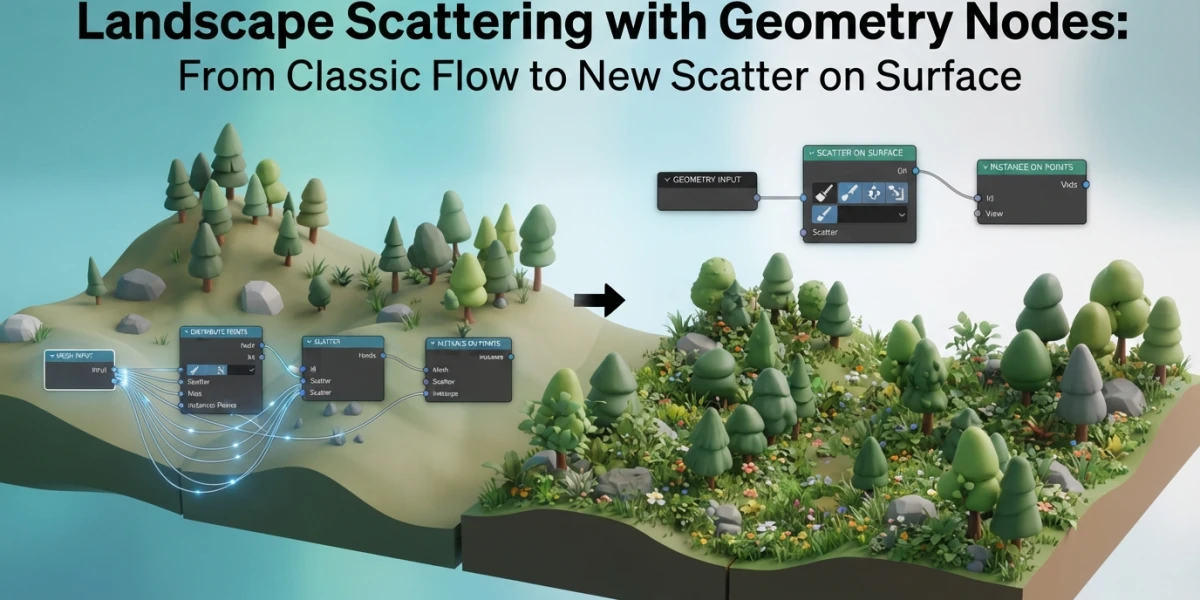
Geometry nodes scatter has turned landscape scattering into a non-destructive, fully procedural workflow: grass, rocks and trees are distributed over terrain without plugins or particle systems. Since Blender 5.2, this is the standard way to populate outdoor scenes, and mastering it saves hours of manual placement.
The Classic Flow: Distribute Points on Faces + Instance on Points
Every geometry nodes scatter setup starts with the same node pair. Distribute Points on Faces generates points across the mesh surface and transfers point, corner and polygon attributes to the new points. Instance on Points then places an instance —an object, a collection or a node group— on each of those points.
Setting up the base system
In Blender's node editor, press Shift+A, open the Add menu and search for Distribute Points on Faces. Connect the Group Input's Geometry output to the node's Mesh socket and its Points output to the Points input of Instance on Points. On the Instance socket, link the object you want to scatter, such as a grass clump or a low rock. The viewport updates instantly: hundreds of copies spread across the surface.
Poisson Disk: density and minimum distance
Distribute Points on Faces offers two distribution methods in its dropdown: Random and Poisson Disk. Random places points without any separation criteria, which causes overlaps when instances have volume. Poisson Disk enforces a minimum distance between points, perfect for grass that should not intersect or rocks that should not stack. For dense grass, try a density of 0.3 with a minimum distance of 0.3 meters; for scattered rocks, drop the density to 0.05 and raise the distance to 1.5 meters.
Recombining with Join Geometry
One detail trips up beginners: if you connect Instance on Points straight to the Group Output, the original terrain disappears from the result. To keep the base mesh visible —the ground, the hill or the rock slab— add a Join Geometry node and combine the scatter output with the input geometry. That keeps terrain and instances in a single object.
Noise-Driven Density
Uniform distribution looks artificial. Nature creates clearings, clusters and empty patches, and you get that by plugging a Noise Texture into the distributor's density.
Noise Texture connected to density
Add a Noise Texture node and connect it to the Density socket of Distribute Points on Faces. With default values, some areas receive far more points than others, producing dense patches next to empty clearings. Adjust the noise Scale: low values (0.5-2) create large, soft patches; high values (5-10) break the density into small groups. A useful trick is routing the noise through a Map Range to narrow the density range, avoiding fully empty or oversaturated areas.
Randomizing rotation and scale
Copied instances share the same rotation and scale, which gives away the repeating pattern. Blender 5.x includes a Randomize Instances node designed exactly for this: controlled variation of position, scale and orientation. You can also use the classic Random Value node — connect it to rotation (0 to 2π on the Z axis to orient grass with the wind) and to scale (a 0.8-1.5 range keeps rocks from all being the same size).
Terrain Orientation and Valid Areas
If your terrain has slopes, instances either dig into the hillside or float in the air. Aligning to the surface normal is the step that separates believable scattering from broken scattering.
Aligning instances to the surface normal
Insert an Align Euler to Vector node and feed it the mesh's Normal attribute; connect its output to the Rotation input of Instance on Points and set the Z axis as the axis to align. Instances now stand perpendicular to the surface, whether the face is flat, tilted or vertical. This single node fixes most landscape scattering issues.
Avoiding slopes and unwanted faces
Not every part of the terrain should receive vegetation: a vertical cliff or a roof should not grow trees. You can filter faces by normal orientation with a Compare node, or more simply use the material index or a vertex group as a mask. In practice, comparing the normal's Z component (greater than 0.3, for example) restricts instances to surfaces that are reasonably horizontal.
The New Scatter on Surface in Blender 5.x
Blender 5.0, released in December 2025, introduced geometry-nodes-based modifiers, and Scatter on Surface has become the primary scattering tool, replacing the legacy particle system and the manual setups described above.
What changed compared to the classic flow
Scatter on Surface works as a native modifier: you add it from the modifier panel and it distributes points or instances over the mesh surface without touching the node editor. The classic Distribute Points on Faces flow is still valid in 4.x and keeps its value when you need fine control, but in 5.x Scatter on Surface covers most cases with a fraction of the work. Blender 5.2 LTS, released on July 14, 2026, consolidates this workflow as the standard, with two years of support through July 2028.
Density, seed and Poisson disk in the new node
The modifier exposes the same controls as the classic flow in a single panel: density, a seed to vary the pattern, and Poisson disk sampling to control the minimum distance between instances. It also includes built-in rotation and scale randomization, so a single modifier replaces the whole node chain. To keep terrain alignment, enable normal alignment inside the modifier itself.
Optimizing Large Scenes
A landscape with a hundred thousand instances renders fine in Cycles as long as you respect one golden rule: do not convert instances into real meshes.
Instances vs Realize Instances
Instances are lightweight references: Blender stores the original geometry once and draws copies. The Realize Instances node converts every copy into an independent mesh, multiplying memory usage and render time with no visual benefit. Use it only when you need to modify each element separately (for example, deforming every leaf), and avoid it everywhere else.
Viewport limits and render tips
To keep working smoothly, lower the density while modeling and raise it only for the final render. You can use Blender's simplification levels or temporarily disable the Scatter on Surface modifier. In Cycles, keep everything as instances and enable adaptive sampling; if the scene is still heavy, split the terrain into several meshes with different densities so distant areas use fewer instances.
Conclusion
Geometry nodes scatter has gone from a node trick to Blender's standard: the classic flow remains the best foundation for learning, and Scatter on Surface speeds up daily work in 5.x. Start with grass on a plane, add noise to the density, then rocks and trees aligned to the terrain — with those three steps you have a complete procedural landscape. If you want to see the process in action, the video tutorials on CGI Academy Hub walk through these workflows step by step on real scenes.